Please let me hear from you!

This blog is for sharing a love of paper crafting. You can also check out my Pintrest pages. If you find the ideas here to be helpful, I'd love to hear from you. It is what helps make the time I put into this blog feel worthwhile, and always brightens my day. I love hearing your ideas too!

(To leave a comment, scroll to the bottom of the post. You will see how many comments there are for that particular post. Click on the number of comments and the comment window will open. Also, if you want to add a link to something, follow the instructions at the bottom of this post.)

NOTE: If you click a link from the menu (below left) and are told the page does not exist, chances are good that it's a prepared post that will post at some point in the future, so be sure to check back!

You can also click this Pinterest Button to pin pictures in the blog posts.


Thursday, August 31, 2017

OSW3 #3 - Latch Card

Here's the 3rd in the series of One Sheet Wonders Set 3.  Again, with the one sheet wonder pieces, I'm using other elements from the Honeysuckle Artful Card Kit (HOTP) as well as other things from my stash.  

CARD FRONT (& Inside that shows through to the front!!):
  • Background - The card (5"x 7") is basically a cut-away card as I started by cutting approx 1 3/8" from the right edge of the card front.  I embossed a 5" x 7" piece of black glimmer paper using a Darice folder called "Damask".  This I then cut into 3 strips just wider than the patterned pieces to serve as a mat (with lots left over at the top).  At the "join" of the patterned paper to the black piece, I put pieces of a red border that was included in the kit.  Then I glued the largest piece to the card front.  Before adding the piece to the card back, I scored it at 1 1/8" and 1 1/4" from the right edge (2 score lines to make opening and closing the card easier).
  • Sentiment - I cut out the shape for the sentiment from the printed greetings page and then matted it on black card stock.  I stamped "Bee Happy" from the HOTP Small Stamp stamp, and hand-wrote "Don't Worry" above it.  Then I added it to the front of the card using foam tape.
  • Bee Latch - The bee forms my latch to hold the card closed.  You can see that his wing (and actually a little of his head) overlaps the card front.  He is attached with foam tape to the inside of the card.

INSIDE:
  • To finish off the inside, I simply added another strip - using the smallest patterned piece & black strip & adding a bit of red border as before.

Wednesday, August 30, 2017

OSW3 #2 - Gap Card

Today's card is the 2nd in my OSW3 set of cards - again using patterned paper & tags from the Honeysuckle Artful Card Kit from HOTP.  This one uses the parts labeled #2.  

This type of card is called a "gap" card because we cut a GAP out of the front of the card and replace it with something else - in this case the black die cut you see here backed by vellum.

CARD FRONT:
  • Card Base - This used a standard A2 red card base.  However, I drew horizontal lines 1 3/8" from the top of the card front & 1 3/8" from the bottom of the card front - and then cut along those lines.  This gave me a little flap at the top and 2 more pieces.  I set the piece from the middle aside and glued the die cut (Sue Wilson's Snowflake Mini Striplet) to the front lower edge of the flap at the top and to the top edge of the remaining 1 3/8" piece I had cut off the front.  This gave me a full-sized card front again - though you could see through to the back through the die cut. 
  • Borders - the three strips of patterned paper I had were just a hair long for the card, so I trimmed them to size - saving the larger one for the inside.  I matted the two smaller ones on black paper with a narrow margin & glued them above and below the die cut as you can see in the picture above. 
  • Sentiment & Finishing - I stamped a sentiment on the coordinating die cut that came from the kit.  The stamp was one from JustRite's "Because I Care" set.  Because the surface of the die cut was a bit shiny, I stamped with StazOn to be safe.  The I tied a bit of ribbon through the hole and attached it in the upper left corner.  The ribbon bow you see in the lower center of the card, actually got moved more to the right in the finished card.
INSIDE:

  • I matted my remaining piece of patterned paper on black and then carefully glued it near the bottom of the card where it wouldn't show through the die cut.  Then I decided I didn't like two things about the die cut.  Any message would show through it - and the back side of it didn't look finished.  So, I fixed both problems by backing the die cut with vellum and then gluing 2 black strips of paper over the join on the inside.

Tuesday, August 29, 2017

OSW3 #1 - Triple Easel Card


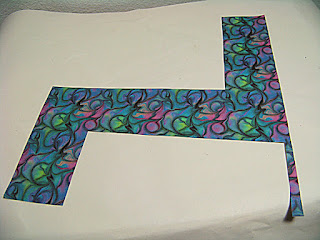
This is the first in my 3rd set of OSW cards.  In addition to pieces from the OSW template using that one sheet of busy patterned paper (shown in this post), I used additional items from that same Artful Card Kit (Honeysuckle ACK from HOTP).  

I started with a card base that was 5"x 6 1/2" when folded.  Then I scored and folded the front in half horizontally and folded it as a mountain fold - like I would for a basic easel card.   

Next, I measured 1 3/8" from each side of this folded card front, drawing vertical lines on the whole of the horizontal card front.  Then I cut along these lines, so my card base looked like this:  


I used the 3 pieces of patterned paper from my OSW (marked #1 on the OSW3 template) as the inspiration & start of my design. 

CARD FRONT:

  • Sides - I cut 2 pieces of black card stock that were 1 1/4" x 5".  To each, I glued one of the smaller patterned paper pieces to the bottom part of this black card stock, allowing for a small margin on all sides.  I glued a smaller pieces of pink paper (1" x 1 5/8" - from the ACK) at the top of each of these black strips.  Deciding a bit of black between the two patterns would look best, I cut a narrow strip of black paper and glued in place between them.  Finally, I glued these black strips to the bottom half of the side fronts, leaving a small bit of white border on the side edges.
  • Center - Once again I cut a piece of black card stock - this time 3 1/2" x 5" and glued my remaining piece of patterned paper the same as for the sides.  This time, however, instead of adding pink patterned paper, I added a die cut tag from the kit, and cut the black card stock away where it was showing above the die cut.
INSIDE:

  • Border - I decided to create a bit of a border using more of the pink paper matted in black.
  • Side Easel Stops - To hold the easel pieces in place when opened, like at the top of this blog entry, I added 3 pieces that were adhered with foam tape.  Two were small pink flowers - die cuts from the ACK.  These hold the side pieces and you'll see that they are farther forward than the center one.
  • Center Easel Stop - This started as a blank tag from the kit - that I stamped with portions of two stamps to get the sentiment that I wanted.  One came from a HOTP set called "Heartfelt Greetings".  The other was from a set called "Sending My Love" from Our Daily Bread.  After cutting it out and stamping it, I thinly matted it on black card stock (so it would be sturdy enough to form my easel stop) before adding it to the card with foam tape.

Monday, August 28, 2017

Dual Side Step Card


The dual side step card is a little more elaborate, but can easily be made using a card blank.  I thought about creating my own measurements to use the card blank as it comes, but that would have made for really challenging measurements.  So, I cut the card down from a 6.5" x 5" card to a 6" x 4.5" card and used the measurements found on Becca's blog.  However, the really important measurement is the 4.5" one - widths could be easily varied, so I could envision a card made from a standard 5" x 7" card base with 1/2" cut off each end giving a 4.5" X 7" card. Here's the process:

Card Base: 
  • Cut your card base down to make a 6" x 4.5" card (6" x 9" when open - DON'T FOLD IT YET).
  • Placing the open card vertically in front of you, measure in 1 1/2" from each edge and draw a light vertical pencil line.
  • Still using a light touch with a pencil, mark these pencil lines as follows: 1" down from the top, 2" up from the bottom.
  • Now, using a craft knife, cut along the vertical lines between your 1" & 2" marks from the previous step.
  • Turn your card horizontally with the 1" mark on your left.  Now you'll be drawing light vertical lines with your pencil that go between your two pencil/cut lines from the previous steps.  Measuring from the left edge, draw these at 1", 2", 3 1/2", 5" & 7".
  • Score along the lines drawn  in the last step.  
  • Fold along these score lines starting from the left: mountain, valley, mountain, valley, mountain.  Fold the outside edge in a mountain fold at the card center (usually this score line is already there in a prepared card blank).  Now your card is ready to decorate.
Decorating: the remaining directions assume you are looking at the card as it is in the picture above
  • Background - From a HOTP Card Maker's Personal Shopper, I found a piece of paper that had these dots on the left, a border in the center, and yellow paper on the right.  I trimmed it so there was 1" of the border attached to the dots.  I glued this to the front of the card base with the border at the bottom, and cut around it.  Taking pieces that were cut off, I cut them to fit the front of the two "steps" in the middle of the card and glued these in place.  The remainder of the border was attached to a yellow piece of paper.  I cut this off with about an inch of the yellow to form a border on the inside of the card (no picture of this).
  • Focal - The focal scene is created using stamps I got free with a Cardmaking & Papercraft magazine subscription.  I stamped them on white card stock with black Versafine ink.  I colored the ground and the dogs with chalk.  Then used watercolor pencils to add the rest of the color, blending some with a water brush & some with a clear Wink of Stella for added shine.  After fussy cutting  around them, I attached the people to the back step and the dogs & flowers to the next step.  After taking the picture, I realized I didn't have as much dimension as I wanted, so I removed the flowers & re-attached them with foam tape.
  • Sentiments - Both sentiments came in the kit.  The larger one was mounted on white card stock for additional stability as it hangs out in front of the scene.

Saturday, August 26, 2017

Folded Panel Card


I've been exploring easy card structures I can make using standard card blanks.  Here's one where the card front is folded back forming two panels - one hidden on the inside - so that half of the inside shows through.

This is what it looks like when opened:


Card Base - Simply score a line dividing the card front in half vertically & fold as a mountain fold.  The pre-scored line will be folded as a valley fold.  

Panels - I cut paper from a HOTP Cardmakers Personal Shopper kit - so about 3/8" of the white base card shows all the way around.  Rather than using paper to mat all of these, I drew a dark purple line around them using a ruler & one of my Zig Scroll & Brush Markers.

Border - narrow piece of paper from the kit.  I drew a dark purple line on either side as for the panels, then matted with white & dark purple before adding it as you see here.  Because of the way the card is constructed, this border is seen whether the card is open or closed.

Focal - The focal is a panel from the kit.  I cut it with a narrow white border & then matted it on dark purple.

Butterfly Embellishment - from the kit - matted with white & then purple.

Friday, August 25, 2017

Nearly OSW Toyshop Window #8


For all the cards in this set that I'm calling "Toyshop Window", I used something from at least 1 of the 3 pages of the 3-page Toyshop Window coordinating set from the Hunkydory Christmas Classics Luxury Card Collection.  I often added stuff from my stash - including tags from the Hunkydory Essential Book of Christmas Sentiments 2016.

CARD FRONT:
  • Background - the Background was embossed with a Craftwell embossing folder called "Decor Circles.  I turned it to the back & lightly traced around the frame - then cut between the inside & outside lines so that the embossing is just on the outside of the frame.
  • Frame & Tree - The tree is cut with a Paper Artist die called "Fancy Christmas Tree" (HOTP).  The frame is a die cut from the Hunkydory set.  I added the frame to the card front with foam tape & then arranged the tree carefully so part of it is behind the frame, and part is in front.  I finished it with several red Jewel Dazzles for ornaments.
  • Sentiment - another from the Essential book - added with foam tape. 

INSIDE:
  • Borders - The inside has border strips cut from the patterned card stock from the kit. 
  • Little Tree - This is cut with another Paper Artist die - from the "Truck O'Goodies" set.  To this I added small jewel Dazzles for decoration.

Thursday, August 24, 2017

Nearly OSW Toyshop Window #7


For all the cards in this set that I'm calling "Toyshop Window", I used something from at least 1 of the 3 pages of the 3-page Toyshop Window coordinating set from the Hunkydory Christmas Classics Luxury Card Collection.  I often added stuff from my stash - including tags from the Hunkydory Essential Book of Christmas Sentiments 2016.

This card is an interlocking gate fold card.

CARD FRONT:
  • Background - Each side of the card front has a piece of card stock from the kit - cut so there is a narrow border of the card base around it.
  • Right Side - I glued the focal die cut (from kit) to JUST the right side of the card front
  • Left Side -  I glued the frame die cut (from kit) to JUST the left side of the card front - then added a sentiment from the Essential book to the top of it with foam tape.

INSIDE:
  • Background - both the center window & the borders on the sides were cut from the same piece of patterned card stock (from kit) and attached as you see here. 
  • Small Poem - from the die cut sheet - added to the right inside of the card as you can see.

Wednesday, August 23, 2017

Nearly OSW Toyshop WIndow #6


For all the cards in this set that I'm calling "Toyshop Window", I used something from at least 1 of the 3 pages of the 3-page Toyshop Window coordinating set from the Hunkydory Christmas Classics Luxury Card Collection.  I often added stuff from my stash - including tags from the Hunkydory Essential Book of Christmas Sentiments 2016.

The picture of this one doesn't show real well because the bird & greeting are red holographic stickers (I think they were Dazzles, but don't find them listed on Paper Wishes website & don't have the packaging anymore).  

CARD FRONT:
  • Background - a strip of patterned card stock from the kit was glued to the lower part of the card front.
  • Focal - The cardinal is a sticker (as mentioned above).  Actually it is several stickers as each gold line outlines a piece of it! I colored the eye with black Enamel Accents and the beak with Sundance Smooch ink (actually added a touch of enamel accents with a pen to shade the beak a bit near the face.
  • Sentiment - the Sentiment is the word "Joy" from the same sticker sheet
  • Embellishment - in the bottom left corner, I've added a bit of holly.  The outline was from the same sticker sheet as the rest.  I backed it with green glimmer paper & added red Jewel Dazzles (HOTP) for berries.

INSIDE:
  • Border - narrow strip of the same card stock as used on the front - with another holly embellishment (made the same way as on the card front).

Tuesday, August 22, 2017

Nearly OSW Toyshop Window #5


For all the cards in this set that I'm calling "Toyshop Window", I used something from at least 1 of the 3 pages of the 3-page Toyshop Window coordinating set from the Hunkydory Christmas Classics Luxury Card Collection.  I often added stuff from my stash - including tags from the Hunkydory Essential Book of Christmas Sentiments 2016.

CARD FRONT:
  • Background - The top part of the background is card stock from the kit; the red at the bottom is glitter fun foam from the dollar store.  Between them I have a piece cut from scraps from the die cut sheet and a dark green grosgrain ribbon from my stash.
  • Focal & Frame - The die cut focal is from the kit and glued directly to the card front.  The frame is cut from the leftovers of the die cut sheet - and added with foam tape.
  • Sentiment - from the Essential book 

INSIDE:
  • Border - a strip of the patterned paper is matted on a scrap from the die cut sheet & then a piece of the glitter fun foam
  • Sentiment - from the Essential book - with a scrap of ribbon from my stash.

Monday, August 21, 2017

Nearly OSW Toyshop Window #4


For all the cards in this set that I'm calling "Toyshop Window", I used something from at least 1 of the 3 pages of the 3-page Toyshop Window coordinating set from the Hunkydory Christmas Classics Luxury Card Collection.  I often added stuff from my stash - including tags from the Hunkydory Essential Book of Christmas Sentiments 2016.  This card actually has quite a bit of sparkle on it - which doesn't show well in the pictures.

CARD FRONT:
  • Background - This one is a little hard to see.  The background is created using two strips of card stock from the kit.  Then I added Wink of Stella to the card itself in between the strips & on the patterned card stock.  It wasn't trying well on the glossy card stock, so I added some Kaleidoscope embossing powder & heat embossed it.
  • Focal - The dog is a die cut from the kit
  • Sentiment - from the Essential book - matted on two layers of paper - with foam tape between them.  

INSIDE:
  • Frame - cut from the leftover die cut sheet.  I then put Wink of Stella all around the outside of the frame for a sparkly background (leaving the space inside the frame for my message when I add it.
  • Sentiment - from Essential book.  Mat was cut from the blue with a die (Paper Artist "6 Layered Labels & 2 Swirls" - HOTP) cut & matted on gold paper using a narrow margin.

Sunday, August 20, 2017

Nearly OSW Toyshop Window #3


For all the cards in this set that I'm calling "Toyshop Window", I used something from at least 1 of the 3 pages of the 3-page Toyshop Window coordinating set from the Hunkydory Christmas Classics Luxury Card Collection.  I often added stuff from my stash - including tags from the Hunkydory Essential Book of Christmas Sentiments 2016.

CARD FRONT:
  • Background - The background is a piece of Hunkydory card stock cut a bit smaller than the card front so the white of the card frames it.
  • Focal - Focal is one of the die cuts from the kit
  • Greeting - is from the Hunkydory Essential book - added with foam tape. 

INSIDE:
  • Border - The border is cut from a strip of the same card stock used for the background.  The sentiment is a die cut from the kit.

Saturday, August 19, 2017

Nearly OSW Toyshop Window #2


For all the cards in this set that I'm calling "Toyshop Window", I used something from at least 1 of the 3 pages of the 3-page Toyshop Window coordinating set from the Hunkydory Christmas Classics Luxury Card Collection.  I often added stuff from my stash - including tags from the Hunkydory Essential Book of Christmas Sentiments 2016.

CARD FRONT:
  • Background - This background is scraps from the die cut sheet, cut & put together the way you see in the picture. 
  • Focal - The words "Merry Christmas" are from a Paper Artist cutting die set by the same name. (HOTP)
  • Embellishments - die cut holly & vines from Spellbinder's Holly Accents & Holly Motifs die sets. With the die cut still in the die, I added chalk - then added Jewel Dazzles (HOTP) for the holly berries. 

INSIDE:
  •  Border - a strip from the die cut sheet, another die cut from Spellbinder's Holly Accents, and a greeting from the Hunkydory Essential Book of Christmas Sentiments 2016.

Friday, August 18, 2017

Nearly OSW Toyshop Window #1


For all the cards in this set that I'm calling "Toyshop Window", I used something from at least 1 of the 3 pages of the 3-page Toyshop Window coordinating set from the Hunkydory Christmas Classics Luxury Card Collection.  I often added stuff from my stash - including tags from the Hunkydory Essential Book of Christmas Sentiments 2016.

CARD FRONT:
  • Background - glued piece of striped paper (from set) in upper area of card leaving a narrow white edge around the top and sides.  Added a piece of green grosgrain ribbon at the border between it and the rest of the card front.
  • Focal - The green tree was cut with a Paper Artist cutting die called "Fancy Christmas Tree" (HOTP).  It sits on a border strip of card stock cut from the top of the die cut sheet.  The sentiment tag is one from the die cut sheet.  All of this is glued to a piece of red metallic tag board that is attached to the card front with foam tape for dimension.

INSIDE:
  • Background - As you can see, I took a small strip of the striped card stock & added a touch of the green ribbon at the bottom, gluing the whole thing in place on the left side of the page.  I added a piece of the red metallic tag board at the bottom.
  • Sentiment - From the "Essential Book of Christmas Sentiments 2016"

Thursday, August 17, 2017

Nearly OSW Toyshop Window


While this wasn't really a One Sheet Wonder set of cards, it was inspired by that technique.  I like buying the Hunkydory "Luxury Card" kits.  They have lots of wonderful die cuts and patterned card stock to play with and make it easy to get quite a few cards created in a small amount of time. Each Luxury card kit appears to actually be made up of 10 smaller 3-page sets: a die cut sheet, and two coordinating patterned card stock sheets (one with foiling).  

I took one of those 3-sheet sets (called Toyshop Window) from the Christmas Classics Luxury Card Collection and tried to see how many cards I could make from that one set (adding stuff from my stash), and how much of the set I could use up - using the techniques I had started using when doing the one sheet wonder cards.  I've always felt it was a waste to toss out the leftover sheet when the die cuts were removed from it - so I DIDN'T! :)

The 8 cards you see in the picture above are the result - and the picture below shows how much of those 3 original pages (including the die cut sheet) was left.


I don't know if I'll get around to using the rest of this later - but I sure feel a sense of satisfaction that I found a way to make use of so much of it!

Wednesday, August 16, 2017

Scrappy Wonder - Card #2


This is the second (and last) card I made from my first Scrappy Wonder.  Here's what I did.

CARD FRONT:
  • Background - For the left side of the card, I matted my two rectangular pieces attached them to the card.  For the right side, I had embossed a 5 1/2" x 4 1/4" of light green velum using an embossing folder from Sizzix called "Evergreen".  I cut a strip off of this and glued it to my card with a fine line of liquid glue just around the edges.  Then I added a black sparkly ribbon to border it.
  • Focal Greeting & Butterfly - The greeting is from Hunkydory's "Essential Book of Pearl Sentiments" - added with foam tape.  The butterfly is heat embossed in blue glittery embossing powder on black card stock.  After fussy cutting the butterfly, I folded up the wings & attached just the body and antennae to the card.

INSIDE:
  • Background - I knew the dark blue would be too dark for a greeting to show well so I added a piece of light green paper (to tie in with the green vellum on the front) - leaving a narrow border of blue showing around it.
  • Border -The border uses my smallest scrap of patterned paper.  I started by attaching a black strip of paper across the bottom of the card - just a bit taller than the height of my patterned strip.  Next I centered the patterned piece and glued it in place.  Then I added a message using stickers from a black Dazzles "Tiny Words and Phrases" (HOTP).
  • Butterfly & Sentiment - The sentiment stamp was from a "Janie's Girls" stamp set.  The butterfly made like the one on the front EXCEPT it is actually two merged together to form one.  It was supposed to be a butterfly sitting on something, but I didn't have anything for it to sit on and it looked weird by itself - like it only had one wing.  So I cut the wing from another one to make a fake 2nd wing.

Tuesday, August 15, 2017

Scrappy Wonder - Card #1


This card was made from cut scraps (HOTP paper - see Scrappy Wonder).  Here's how I did the rest of it.

CARD FRONT:
  • Background - This background is not as simple as it appears.  Though you can't see it well, the edges that look white in the picture actually have a bit of a purple halo to them - more about that when we talk about the inside where the picture shows the purple halo a little better.  Other than creating that purple halo, I simply glued my strip of patterned paper a scant 1/8" from the left edge.
  • Focal - The focal is a piece I created using black paper and sparkly blue embossing powder (ZING - blue - glitter finish).  The borders and greeting were stamped using stamps from "Lacy Things" stamp set (HOTP).  After attaching this piece, I glued a purple sparkly ribbon as a bit of a border.
  • Butterfly - This was made the same way as the focal using another stamp from Lacy Things stamp set.  I fussy cut around it and then attached the body and part of the antennae to the card, leaving the rest free.
INSIDE:

  • Purple "halo" - First I created my purple halo using a sparkly purple Gelato and my finger.  You can see what I did a bit better by looking at the picture below - taken before I added anything else to the inside of the card.  I drew a line with my gelato in such a way that it would be hidden when I glued my paper scrap in place.  Then, using my finger, I blended the gelato color outward.
  • Background - After creating my purple halo, I glued my paper scrap in place & then ran a purple sparkly ribbon across the top.
  • Butterfly & Trail - The butterfly was another image from Lacy Things, created in the same way as the larger butterfly.  I just glued the body and antennae to the page, folding the wings up so there was a bit of dimension.  To create the butterfly trail, I used "innies" from Purple Jewel Border Dazzles (HOTP).

Monday, August 14, 2017

Scrappy Wonder


Well, even after doing TWO one sheet wonders, I found I still needed more cards!  I had some leftover embossed elements I had made in blue & black and wanted to find something to go with them.  Turning to my scrap drawer, I found this scrap that went nicely with them.  It was then that I had my "Ah ha!" moment.

I HATE throwing away pretty paper, so I have several drawers of scraps organized by color.  Though I use them occasionally, I've mostly just been accumulating a bunch of scraps.  But NOW I know how to use them up and feel really good about it!

Basically, for the One Sheet Wonders, I've been taking a full sheet of 12" x 12" paper & cutting it into little pieces before figuring out how to use those pieces on a card.  I could do the same with my scraps - just cut them into pieces and see what I can make with them!!!!   

The next picture shows approximately how I cut this scrap of paper.  


The last picture shows the two cards I made using these pieces of scrap.  3 pieces went on the front of these cards, the other two went inside them.


Sunday, August 13, 2017

Golden Anniversary


Here's my last gold-embossed card from this card making marathon.  I thought it would be great for a golden anniversary card.

CARD FRONT:
  • Background - The background was created in layers.  First a black piece of paper a bit smaller than the card front; then a piece of gold holographic a bit smaller than that (I cut out the center of it that wouldn't be seen using a rectangular die - and saved that for another project). 
  • Focal - The focal started as a black rectangular piece of card stock to which I added heat-embossed images.  The borders are from Lacy Things stamp set (HOTP).  The sentiment from the Stamp and Punch set (HOTP).  The wedding couple are from Inkadinkadoo's Wedding set.  After I had heat embossed those, I went back and heat embossed the bottom of the girl's dress again, adding my VersaMark ink with the tip of a hardened pencil eraser to fill it in better so the border didn't show through so much.  When all was ready, I attached it to the card front with foam tape and added a bow in the upper left-hand corner.

INSIDE:
  • Borders - As you can probably tell, these are heat embossed in the same way and using the same stamp as was used on the front of the card.  However, I cut these out leaving a narrow black border all the way around.

Saturday, August 12, 2017

Beautiful Day


Today's card started out as possible elements for one last one sheet wonder card set with the gold heat-embossed images on black paper.  But since I didn't use any of the patterned paper, it isn't really a part of that set. 

Here's how I made it:

CARD FRONT:
  • Background - background & focal (with finishing touches) were put together as a card topper before being added to the card front.  The background was a black piece of paper cut a bit smaller than the card front.  On top of that is a piece of embossed gold glimmer paper (smaller still).  It was embossed with a 5" x 7" M-Bossabilities folder called "Imperial" (Spellbinders).
  • Focal - Focal used stamps from Lacy Things stamp set (HOTP) to heat emboss in gold on a black background.
  • Finishing - I added black 1/8" satin ribbon, lining it up with the lace & wrapping it around the black background piece.  Then the whole "topper" was attached to the card.  A bow in the upper left corner finishes the front.

INSIDE:
 
  • Border - A gold strip of glimmer paper was embossed using a Cuttlebug embossing folder, then matted on black before being added to the bottom of the inside of the card.
  • Butterfly - Another stamp from Lacy Things heat embossed in gold on black paper - then fussy cut before gluing just the body & antennae in place (wings folded up)

Friday, August 11, 2017

Second OSW - Card #9


This is the 9th and last card in my 2nd One Sheet Wonder set - using pieces corresponding to #9 on my template (see it here).  Here's what I did to make this one:

CARD FRONT: 
  • Background - I first attached a piece of gold glimmer paper that was cut just a bit smaller than the card front.  Then I glued my largest patterned piece - centering it.
  • Focal - Using a die from Spellbinders "Radiant Rectangles" I cut the shape out of black card stock.  Next I covered the filigree with VersaMark ink & heat embossed it.  Then I heat embossed the wedding couple (Weddings by Inkadinkadoo) and the sentiment (from JustRite's Ever After Antique Labels One). Then I simply attached it to the card front using foam tape.

INSIDE:
  • Background - Once again started with a piece of gold glimmer paper just smaller than the inside of the card - gluing it so the black of the card formed a mat.  Then I added the two remaining strips of patterned paper on either side, as you can see.
  • Focal - This focal was made like that on the front - using a die from Spellbinders' Decorative Labels Eight and stamps from  Inkadinkadoo's Wedding set.  I just glued this one directly in place (no foam tape).

Thursday, August 10, 2017

Second OSW - Card #8


This card is a little hard to see because of so much shiny red!!!  This is the 8th card in my 2nd OSW set of cards - corresponding to pieces labeled #8 in my template here

CARD BASE:
  • Basic Pattern - This card was made as a clutch - similar to what I did for the purse card I made awhile back. I started with a piece of red metallic card stock.  Before scoring it I embossed the whole piece. Then I rounded the corners of the flap part of the clutch.
  • Embossing - I used a large A5 embossing folder from Craftwell (Decor Circles by Teresa Collins).  

CARD FRONT:
  • Background - Using the two larger pieces of patterned paper, I glued the smaller to the flap and the larger to the rest of the outside of this card.  I think it would have looked better if they had been matted on black, but that didn't happen.
  • Catch & Clasp - As you can probably see from the picture, I attached a long strip of the foil card stock to the lower part of the front with brads.  This holds the clasp in place.  To form the clasp, I took the smaller rectangle piece of patterned paper & cut it into more of a diamond shape.  Then I matted it on the red metallic card stock & attached to the flap of the clutch with another small black brad.  
  • Sentiment - The sentiment was heat embossed on a rectangle of black paper & then glued in place.  Sentiment was created with a stamp from the Artful Affirmations set (HOTP).

INSIDE:

  • Background - I covered most surfaces with plain metallic red card stock (this not only made it look nice, but also covered the brad legs) - leaving just the "bottom" of the purse which I inked in red.
  • Focal - The sentiment was another one that was heat embossed on black paper using a stamp from Artful Affirmations.  It is visually anchored to the background with the narrow strip of patterned paper.

Wednesday, August 9, 2017

Aperture Card


I don't know why I don't think to do this more often.  These types of cards used to be hard to make, but with dies they are so EASY!!!!!  

CARD FRONT:
  • Background - Background is paper from a Paper Wishes Card Makers Personal Shopper kit.  I cut a piece of the argyle just smaller than the card so I would have a white border.  Before gluing to the card, I took one of my purple Scroll & Brush markers and drew all the way around the paper to make it look like it was matted on purple.
  • Border - More papers from the kit.  I used a strip of the butterfly paper & matted it with a strip that had the lavender on one side & the peach on the other.  Once again, I drew faux matting with my marker.
  • Aperture - Next I chose I die (smallest of JustRite's Nested Medallion Labels) and cut through the card front in the lower right corner, saving the piece that was cut out to mat the sentiment.  Then I used 2 dies together (smallest & next one larger) to cut a frame for my aperture out of purple paper & attached it as you see.  (I'll talk about what you see through the aperture when we get to the inside of the card.
  • Sentiment - I made a mat for the "removed piece" from the aperture by drawing around the die on purple paper and then fussy cutting it (allows for a narrower mat than cutting with the next largest die).  Then I took the smallest die from my "Accordion Fancy Label" set (Elizabeth Craft Designs) and die cut a small piece from white glimmer paper.  I used my marker to draw a faux mat around this as well as to ink the stamp (JustRite's "Be Strong" set) used for the sentiment.

CARD INSIDE: 
  • Background - For the inside of the card I used another strip of the butterfly paper, with a marker-drawn faux mat to cover the right side - leaving a narrow border.  
  • Butterfly - The butterfly is a dimensional mylar sticker from the dollar store.  It was white but I turned it purplish by adding a little ink from a Sharpie near the center and pulling the color out with my finger before it had a chance to dry.

Second OSW - Card #7


This is the 7th card in my 2nd One Sheet Wonder set - using pieces corresponding to #7 on my template (see it here).  Here's what I did to make this one:

All but two of the cards in this set are A2 size (5 1/2" x 4 1/4").  This is one of the exceptions.  It is 5" x 7" made using a cream-colored card base.

CARD FRONT:

  • Background - I created the background in layers - first a piece of black paper slightly smaller than the card front.  Next was a 5 1//2" x 4 1/4" piece of embossed gold glimmer paper (embossed with a French Lattice die from Cheery Lynn - by using embossing mat instead of cutting plate).  On top of that I arranged my 3 patterned pieces (each narrowly matted on black paper).
  • Focal - Stamped & heat embossed using a couple of stamps from "Ever After Antique Labels One" (JustRite).  Before attaching it to the card front with foam tape, I added some Jewel Border Dazzles around the edges of the black to frame it.
  • Finishing - A bow from my stash completed the card front.

INSIDE:


  • Border - You can't really see it, but the gold glimmer paper strip near the bottom of the inside is embossed with a border pattern (Cuttlebug).  
  • Focal - Started with black card stock & cut it using a die from "Twisted Metal Tags & Accents" set (Spellbinders). This gave me two pieces - the frame & the inside piece.  The inside piece was stamped & heat embossed with a stamp from a Wedding set from Inkadinkadoo.  For the frame, I placed it on my craft mat & covered it with VersaMark ink before heat embossing it with gold glitter embossing powder.