Please let me hear from you!

This blog is for sharing a love of paper crafting. You can also check out my Pintrest pages. If you find the ideas here to be helpful, I'd love to hear from you. It is what helps make the time I put into this blog feel worthwhile, and always brightens my day. I love hearing your ideas too!

(To leave a comment, scroll to the bottom of the post. You will see how many comments there are for that particular post. Click on the number of comments and the comment window will open. Also, if you want to add a link to something, follow the instructions at the bottom of this post.)

NOTE: If you click a link from the menu (below left) and are told the page does not exist, chances are good that it's a prepared post that will post at some point in the future, so be sure to check back!

You can also click this Pinterest Button to pin pictures in the blog posts.


Friday, October 30, 2020

Thank You ACK

Today I needed some more thank you cards.  Since I also wanted to continue using up this HOTP Artful Card Kit (ACK) called Sunshine & Smiles, I decided to use those materials.  

Card #1 (above): This first card is obviously a gate fold card.  The background paper is from the ACK and the focal was cut from the center of one of the included die cuts using a die from my circle die set (Lifestyle Crafts).  I inked the edges of the cut focal and matted it on a gold piece of tag board that had been cut using a die from Spellbinders' Luscious Labels One.  I also matted the background on the gold card stock.  Then I added gold washi tape borders top & bottom and a sentiment cut from a Crafts U Print freebie.

Card#2:

Again I mostly used supplies from the ACK.  From my stash I added a dark green scrap of card stock for the border & the green letters for the sentiment.  (I drew around the edges of these with a Sharpie pen.)

Inside:

Inside there is more of the same ACK materials.  These two cards bring my total so far from this ACK to at least 5 (a few items were missing from the kit, so I must have made something that wasn't included in these blog posts).

Thursday, October 29, 2020

Bruges to Damme

Today's scrapbook pages started as a "hopscotch" challenge.  The page needed to be made with 75% white space, have a hand-made embellishment on it, and use something from my stash that was in abundant supply.  

Page #1:

This first page met that challenge - the white space you can see for yourself, the red bicycle was hand-made using a stamp on red foil paper (stamped with a Bo Bunny stamp, heat embossed in black, backed with card stock & fussy cut), and the surplus element was the letter stickers used on the page titles.  I really didn't care much for this first page.  I had hoped that the two bicycle embellishments (one hand-made, one a Dazzles sticker) would pair up with the main bicycle in the picture to create the "rule of three" look, but I'm not sure that happened - and overall the page looked pretty plain. 

Update 3/7/2023:

After going through the rest of my memorabilia, I found the map and brochure that we got at the bike rental place and added pockets for them.

Page #2:


I did not really like the first page, but when I created a companion page for it, I got the result shown in the first picture above - and I really like that.  Together they accomplish what neither one alone can do.


Monday, October 26, 2020

Pumpkin Thanksgiving 2019

The page started with a paper napkin - see here for preparation technique.  Other than the napkin, this layout is pretty simple.  I used a plain brown sheet of 12 x 12 card stock, some black card stock, and some washi tape.  The journaling was printed onto a piece of napkin (print first on paper, then tape napkin over print with removable tape, then run through printer again).

Sunday, October 25, 2020

Honeysuckle ACK Part 12

Today I have 4 more cards that finish up this kit.  YAY!!!!   I've made more than 17 cards from this kit so far.  These 4 bring the total to 21 cards from this one kit.  

Card #18: (above) - In addition to materials in the kit, this card used Dazzles and washi tape from my stash.

Inside:

Card #19: 

For this card, in addition to card stock, I've added a sticker from my stash (mouse) and a cat (stamp & die from Stampendous "Pop Up Kitty") I colored her with Inktense pencils & water brush, white gel pen, and pink Smooch Ink.

Inside: (greeting is a cut out from a Debbi Moore set).


 Card #20:

Card #20 adds more card stock from my stash, Dazzles, a cutout greeting from Debbi Moore set, and a border piece from Hunkydory (inside).

Inside:


 Card #21: 

Woo hoo!  This is the last card from this kit!  In addition to materials from the kit, I added card stock and glimmer paper from my stash, a couple of Hunkydory greetings, and a freebie cutout greeting from CraftsUPrint.

Inside:


Friday, October 23, 2020

Halloween Sticker Card


Today's card was a quickie made for a couple of challenges - use of "splatter" and "stickers".   

Background: The background is a piece of watercolor paper colored with Distress inks and Distress Oxide inks.  

Picture Stickers: The picture stickers are from a sticker book I was given (The Antiquarian Sticker Book).  

Splatter: The splatter doesn't show very well.  It was supposed to be snow in the sky.  I used white pigment ink from a stamp pad with a bit of water added - used a toothbrush to make it "splatter".

Words:  The words are formed from alphabet stickers I had in my stash.

Frame: Black card stock frame created using dies from Spellbinder's 5X7 Matting Basics dies.

Thursday, October 22, 2020

If My People . . .

Today's Bible Journaling page focuses on 2 Chronicles 7:13,14.  You can read about what it means to me here.  As for how I made it, after protecting the page with a couple of layers of gesso:

Focal: I started with a rough drawing I found on the internet, drawing the outlines in with my Inktense pencils (watercolor pencil for hands and face as I don't have that color in Inktense).  Then I used a water brush to pull the color from the outlines into the main body of the of the drawing.  

Background: The background was colored with Opal polish (Summer Sky) watered down a bit with a water brush.  

Quote: After that was all dry, I added the words using a set of Pitt pens.

Wednesday, October 21, 2020

Sketch Challenge Thank You

Today's card was based on a sketch from Becky Moore at CardMaps (see below).  As you can see, I turned the sketch on its side & made it a cut-away card.  HOTP Artful card kit called "Honeysuckle" is where most of the materials came from.  I also used the bracket border die from Spellbinders and a stamp from HOTP's "Labels & Trim".  I wish I had embossed the card front before adding my embellishments.  I also found I wished I had matted the various pieces in black - so I faked it with a Sharpie marker.  

Sketch:


Inside:

I should have used the sharpie on these pieces too, but didn't think of it.  The Sharpie bled through in one spot, so I added more dotted paper to continue the line & then a flower to hide the bleed.

Tuesday, October 20, 2020

Thank You Pick & Play

This card was for a Pick & Play challenge where my card needed to be: shaped, thank you, pink, gray, watercolor, and stamping.  I had wanted to do watercolor stripes as I've seen others do, but mine just ended up to be a fairly plain watercolor wash.  

Materials used:

  • watercolor paper
  • pink card stock
  • white card stock
  • silver metallic poster board
  • silver metallic watercolor pencil
  • worn lipstick distress ink
  • Paper Artist cutting die called "Love and 5 Hearts"
  • 3D embossing folder called "Celtic Weave" (Spellbinders)
  • "Thank You" stamp set (HOTP)
  • Black ink pad (Versafine)
  • Black embossing powder
  • Inktense pencil
  • Waterbrush


Saturday, October 3, 2020

Show & Tell

Faux Tile - For this card, I stamped the scene (using Nautical stamps from Phill Martin) using distress ink - then scored on the diagonal every 3/4".  I cut a 90 degree inside corner from a piece of scrap card stock to use as a mask, before adding ink to the bottom two sides of each diamond created by the scoring.  Stamp used for the sentiment was from Tiny Words & Images stamp set (HOTP).  Sentiment was cut with a die from 6 Layered Labels & 2 Swirls and the mat was cut with a die from 9 Tiny Tags & Little Labels (both from HOTP).  

Inside:

I created a smaller panel for the inside, using the same materials.

Card #2:

Here I have a new-to-me card shape - created from a standard 5" x 7" card base.  Here's how to make it:

  • Mark middle of sides & bottom of the front panel.
  • Score from upper corners of front panel to the mark in the middle of the bottom.
  • Score from middle of sides of front panel to the mark in the middle of the bottom.
  • Fold & crease well - first one is a mountain fold, 2nd is valley fold - then glue together to keep the bulk down and make it lie flat.
  • Create decorative panels by taking standard rectangular panels, marking middle of bottom, and cutting from upper corners to middle of bottom.  The side pieces then go to the inside of the card, and the middle one to the card front.
  • Decorate as you wish - I used flowers/leaves from my stash - including several created with Heartfelt Creations stamps & dies (poppies, leaves).  I also used brads & a greeting from a Debbi Moore freebie.

Inside:

Bay Window Card

In preparing to host WCMD on the PWMB, I had been looking through various ideas I've collected over the years and came across a couple of "Bay Window" cards.  I thought it was a GREAT way to use scenic patterned papers - ones I love but have struggled to know how to use.  There were things I didn't particularly care for about each of the ones I saw, so I decided to make my own pattern.  Here it is:


This makes a finished card that is 4 1/2" x 6".  In addition to the base panel, you need a scene of some sort - 4 1/4" x 5".   Here's a picture of what my initial scene looked like:


Card #1 (when closed):

Normally when I make this type of card, I simply cut the scene into 3 panels - 1 5/8" x 4 1/4" for the Left & Right panels and 1 3/4" x 4 1/4" for the center panel.  This time, I made the white mats that size and trimmed the 3 panels that I cut from the initial scene even smaller to fit within the mats.  

The greeting on the front of the card was stamped & heat embossed from a set called "Labels and Trims" (HOTP).  It was die cut with a JustRite die from the set "Vintage Labels Four".
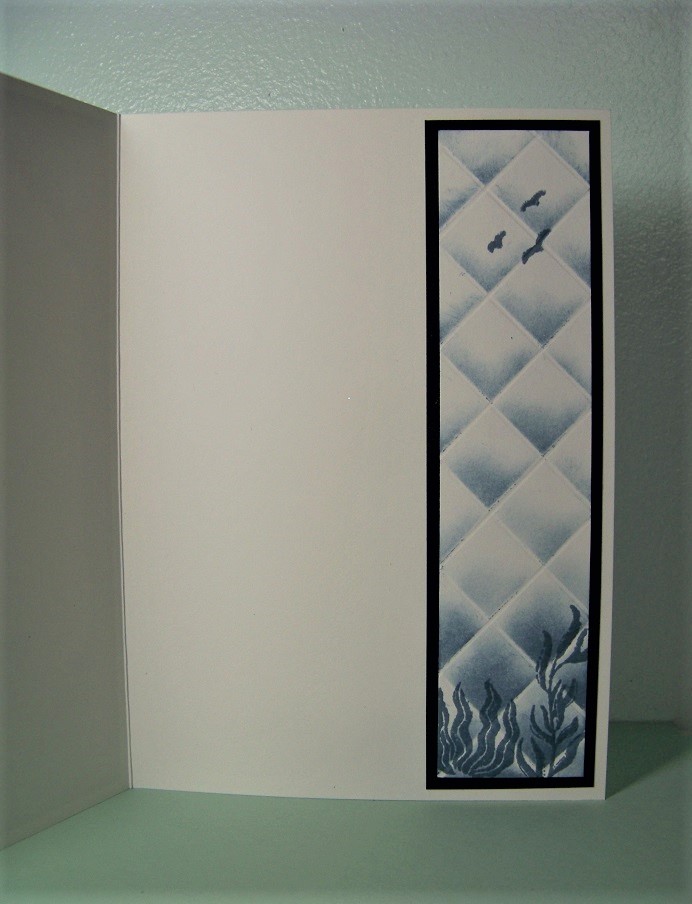
Inside:

In addition to adding white panels inside, I added a greeting that was stamped & heat embossed using stamps from two different sets - the outline was from the same "Labels and Trims", while the message inside was from "Because I Care" from JustRite.  As always for this type of card, it is attached with a piece of foam tape down the CENTER (not going to the edge since that needs to be free for the card front to tuck into.


Card #2 (as displayed):


Card #2 (when closed): 


This time I used a panel from a set from Heartfelt Creations called "Woodsy Wonderland". I also added a small bird & butterfly that I made using their coordinating stamps and dies.  The stamped greeting is from a small stamp set from HOTP called "Dragonfly".

Card #2 (inside):


Inside I used more patterned paper from the Woodsy Wonderland collection & added another butterfly.  The stamped greeting came from another HOTP set called "Matching Borders and Focals".

Card #3 (as displayed):

Card #3 (when closed): 


This time I used a patterned piece of card stock as my card base - a yellow plaid.  For my scene, I printed a freebie from Debbi Moore.  This time I chose to ink the edges of each panel in black ink.  The greeting was stamped using a stamp from JustRite's "Grand Sentiments".  This was then die cut using a die from HOTP's "9 Tiny Tags and Little Labels".  The butterfly was from the dollar store.

Card #3 (inside):

Inside is a panel of white paper that was sprayed with golden glimmer mist for a light golden sheen.  The greeting was stamped from JustRite's "You are the Best" set and then die cut and stenciled using another JustRite die from the "Vintage Labels Two" set.