Please let me hear from you!

This blog is for sharing a love of paper crafting. You can also check out my Pintrest pages. If you find the ideas here to be helpful, I'd love to hear from you. It is what helps make the time I put into this blog feel worthwhile, and always brightens my day. I love hearing your ideas too!

(To leave a comment, scroll to the bottom of the post. You will see how many comments there are for that particular post. Click on the number of comments and the comment window will open. Also, if you want to add a link to something, follow the instructions at the bottom of this post.)

NOTE: If you click a link from the menu (below left) and are told the page does not exist, chances are good that it's a prepared post that will post at some point in the future, so be sure to check back!

You can also click this Pinterest Button to pin pictures in the blog posts.


Friday, July 31, 2020

Sugar Plum ACK - Part 4


Today I have 3 more cards from the Sugar Plum ACK (Artful Card Kit - HOTP).  This brings the running total of cards from this kit to 10. 

Card #1 (above):  For this first card I started with a craft colored card base & embossed it with a 3D embossing folder (Ornate Lace by Gemini).  I hit the embossed areas with silver ink to help them coordinate with the focal.  I layered 3 die cut pieces from the kit, punched holes & threaded a narrow silver ribbon through them.  Then I matted the whole thing on a purple mat that was cut with Parisian Motifs die from Spellbinders.  The sentiment is a cutout from the kit, but I matted it on purple card stock.

Inside:  


Inside I added a couple of strips of the purple card stock for borders, then layered a cutout sentiment from the kit over a purple piece die cut using the same Spellbinder's Parisian Motifs & then matted on tan patterned paper (both purple and tan patterned papers are from the kit.

Card #2


Next up is a 4" x 9" card (fits into standard business sized envelope).  Most elements are from the kit.  The border piece is from the same card stock that I used for the card base - but I embossed it with the D'vine Swirl embossing folder from Cuttlebug.  The stamped sentiment (on a tag from the kit) is from JustRite's Deck the Halls.
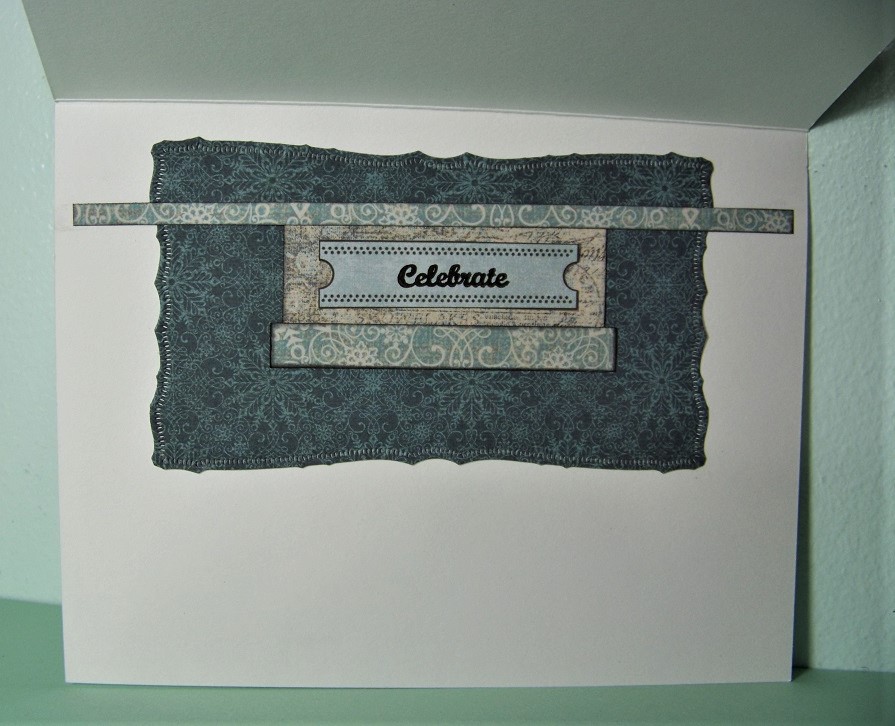
Inside:


Similar materials were used on the inside: cutouts and die cuts from the kit, paper from the kit, embossed card stock like on the front, a narrow strip of silver poster board from my stash, and a Red Border Dazzle from HOTP.

Card #3:


Card #3 is a side-ways gatefold card.  Most materials are from the kit.  I fussy cut the borders from striped paper in the kit, popped out the center that came in the focal frame and backed it with paper from the kit, added ribbon from my stash.  Finally, I stamped the sentiment & heat embossed it with clear powder (stamp from Christmas Cheer - HOTP).

Inside:


Inside I used papers & die cuts from the kit - adding a bit of black Sharpie to cover the red that I didn't really want.  The lace and ribbon were from my stash.  The main stamped sentiment was from the Naughty and Nice stamp set (HOTP).  The smaller stamped sentiment (on the die cut) was from the Snow Globe set (also HOTP).

Wednesday, July 29, 2020

Honeysuckle ACK - Part 10


Just one Honeysuckle card today - from Honeysuckle Artful Card Kit (HOTP) - but this brings the grand total to 16 cards from this kit and counting!

This time I made a basic center step card.  All materials except the plain black card stock strips were from the kit.  The greeting was stamped from a set called Greetings and Labels from HOTP. 

Inside:

Inside are more of the same materials, including another cutout from the kit.  The sentiment is stamped using a Gina K stamp from her Wreath Builder set.

Sugar Plum ACK - Part 3


Today I have another quick card from the Sugar Plum Foil Artful Card Kit from HOTP.  This brings the total number of cards so far from this kit to 7.  This time I started with a white card & the 3D Sparkling Snowfall embossing folder from Crafter's Companion.   The deer & bottom border are from the kit, along with the tag in the top right hand corner.  I die cut the top border from silver poster board (Spellbinder's Ironworks Accents) & added a little confetti snowflake to the tag.  The sentiment on the tag is hand written using a fine Sharpie Marker.

Inside:

Inside I have a strip of glimmer paper for a border.  I cut off the existing frame on the die cut from the kit and matted it on a die cut made using Fancy Tags 2 from Spellbinders and silver poster board.  The sentiment is from JustRite's Christmas Vintage Labels One.

Tuesday, July 28, 2020

Sugar Plum ACK - Part 2


Today I worked some more with the Sugar Plum Artful Card Kit (ACK) by HOTP.  4 more cards made brings my total from this kit so far to 6 cards. 

Card #1 (above): This first card is a center step card with shaker, using die cuts from the kit, a piece of plastic, paper from the kit, cut out labels from the kit, and an embossing folder called Swiss Dots by Cuttlebug.

Inside:

Inside I have another cut out sentiment, paper & die cut from the kit.  The dark red is from my stash.

Card #2:

My second card is another shaker card.  The frame is the outer part of a die cut (that the center had been cut out of for a card in Part 1 - using a Petite Oval Scallop Large die from Spellbinders).  The background was embossed with Scattered Holly folder from Crafter's Companion.

Inside:

Inside, strips of paper from the kit, along with a ribbon from my stash, form borders.  The sentiment is a cutout from the kit - matted on a piece of red from my stash that was cut with a Spellbinder's die (Radiant Rectangles) that was cut apart and shortened.

Card #3:

The third card is an A2 sized card - embossed with a folder called Doily Lace from Darice.  The focal started with a large die cut from the kit.  A cutout sentiment is matted twice (first mat was die cut with a Damask Accents die (Spellbinders), cut in half and extended with a small additional piece of red glimmer paper); second mat was die cut from patterned paper in the kit using a die from Persian Motifs (Spellbinders)).

Inside:

Inside patterned paper from the kit & ribbon from my stash forms borders.  A cutout sentiment forms a focal inside - accented with a star-shaped die cut from the kit.

Card #4:

This time patterned paper from the kit forms the backdrop for my focal - with a lace border created by sewing two pieces of lace together.  The focal itself starts with a layer of die cuts from the kit, matted with two die cut mats (Radiant Rectangles Spellbinders dies cut tan patterned paper from the kit; Labels Twenty Spellbinders die cut a red glimmer paper).  The star is a double-punched element cut from silver poster board and red glimmer paper.  The final pieces are cutout sentiments from the kit.

Inside:

The inside once again has paper strip borders & a cutout sentiment - this one stamped with a Stampin' Up stamp from the set called Beautiful Season.

Sunday, July 26, 2020

Honeysuckle ACK - Part 9!


I actually started working on this Honeysuckle Artful Card Kit a couple of years ago.  I first made a bunch of cards as a part of a One Sheet Wonder set (see here: 1, 2, 3, 4, 5, 6, 7).  Then I made a couple of thank you cards (Honeysuckle Thank You).  So, I already had 9 cards made from this kit and decided it was time to finish it up!  I thought it wouldn't take long, but so far I have 6 more cards and more to go!  

Card #1 (above):  This first card is an A2 size - made from black card stock & embossed with a HOTP embossing folder called Lacy Border.  I used the same embossing folder with a piece of the patterned paper & cut it to fit.  The focal was fussy cut from the cover sheet from the set and then layered on black (die cut with a Spellbinder's die - Ironworks Motifs) and red glimmer paper (cut with Spellbinder's Splendid Circles - which I trimmed of it's outer ring).  The flowers & fussy cut label come from the kit.

Inside:

Inside are more paper pieces and elements from the kit.  The sentiments were stamped & embossed with stamps from JustRite's Because I Care stamp set. 

Card#2:

More elements from the kit combine with black card to create this card front - tag in upper left corner was stamped with a stamp from JustRite's Friends Antique Labels One.  The other label was stamped with a stamp from Paper Discovery's Timeless.

Inside:

Inside are more papers from the kit, along with some from my stash.

Card #3:

For this card, most things were from the kit, but I DID add some other papers from my stash.  I also didn't like the colors of the big label - so I cut out the inside & backed it with gray patterned paper from my stash.  I hand printed the word "Feel" to the little tag.

Inside:

Inside are more papers - and a small tag from the kit - which I stamped & heat embossed with a stamp from HOTP's Heartfelt Greetings

Card #4:

For this card I started with a background of patterned paper from the kit - along with black paper and white ribbon from my stash.  The focal is from the kit - with a couple JustRite stamps from For All You Do Vintage Labels Three.  The stamp on the smaller label is from Divinity Design's Thanks For Everything

Inside:

Inside are more papers (red & black from my stash) and a tag from the kit - stamped and heat embossed with a stamp from JustRite's Antique Autumn Tags One.

Card #5:

The card front is put together using elements from the kit.  The focal greeting is matted using a die from the Twisted Metal Tags and Accents set from Spellbinders and trimmed with scissors.  I highlighted the bees using Smooch ink.

Inside:

Inside are additional elements from the kit.

Card #6:

Black card stock forms the base for this card.  The papers are from my stash.  The red is embossed using Darice's 5x7 Damask embossing folder & then inked with black soot ink (Distress Ink).  The black ribbon is from my stash.  The focal tag is from the kit - with a butterfly from my stash.  This is matted with a black mat (die cut with Spellbinder's Ironworks Accents) and a red mat (cut in in pieces with center removed (die cut with Spellbinder's Radiant Rectangles).  The greeting tag & flower are from the kit, but I added a red rhinestone from my stash.

Inside:
The papers inside are from my stash, but the die cuts are from the kit (with a red rhinestone from my stash added to the center flower).  The top sentiment was hand-printed.  The lower sentiment is stamped using a stamp from HOTP's Botanical Frames.

Saturday, July 25, 2020

Sugar Plum Foil ACK - Part 1


Yesterday I started working on another ACK (Artful Card Kit) called Sugar Plum Foil.  I'm finding it to be a real challenge because, though I like the purples and foiling in the kit, I don't care for the other colors nearly as much.  At any rate, here are the first two cards I've made from this kit.  This first card (above) is 9" x 4" - made to fit in a business sized envelope.  All elements on the front of the card are from the kit, but the background oval was cut from the center of a die cut from the kit using Spellbinder's Petite Scalloped Oval Large.  The remaining outer frame of that die cut was saved for another card.

Inside:

On the inside, I used more of the patterned paper, cut a border from the striped paper included in the kit, and then stamped a greeting (Christmas Cheer stamp set from HOTP).

Card #2:

For this card, I focused on the purple & silver.  I used paper from the kit for the background, but matted it with purple card stock from my stash.  I also cut the words "WE" and "YOU" from the same purple card stock.  I also added a sheer purple ribbon from my stash.  Everything else is from the kit.  The purple swirly element at the bottom came with a red checked heart in the center.  I covered this with another heart from the set (raised on foam tape for added interest) so I could keep to the purple theme.

Inside:

For the inside, I started with the dotted paper from the kit and added a panel of the purple card stock before adding a center section of the dotted paper so I have a place to write my message.  I die cut an "A" from the purple card stock and stamped "Merry Christmas" (Christmas Art stamp set by HOTP).  The "A" is layered on a silver heart from the kit & the silver swirls also came from the kit.

Thursday, July 23, 2020

Wonderland ACK part 5

I just finished the Wonderland ACK (artful card kit)!  YAY!  I got 5 more cards out of the materials, bringing the grand total for this ACK to 15 cards (but I could have gotten many more if I hadn't doubled up on so many of the die cuts!).  Still, 15 is not bad!

Card #1(above):  This first is a window scene.  All elements, except the silhouette deer, were from the ACK.  The deer are cut from a Heartfelt Greetings die set called "Woodsy Critters".

Inside:

Inside are more elements like those on the card front.  Small word "peace" is stamped using a stamp from a HOTP stamp set called Christmas Art.

Card #2: 

This card, though it makes use of the ATC elements for tags & patterned papers, has a focal & large greeting from a peel off desk calendar that I was given (not sure what it was called).  Sentiment stamped from HOTP Snowglobe set.

Inside:

Inside are scraps of papers from the kit (one die cut with Spellbinder's Radiant Rectangles), along with a label with stamped greeting (HOTP - Christmas Art).

Card #3:

This card was for a challenge - I turned a sketch on it's side and came up with this card front. using papers & tags/labels from the kit.  Stamps were used for the sentiments & swirl on tiny tag (Heartfelt Greetings by HOTP and Christmas Words - also HOTP).  Snowflakes are confetti from my stash - gold ones were originally a royal blue which I colored gold with a Sharpie pen.  You can't tell it from the picture, but the center piece of patterned paper was sprayed with Shimmer Spritz - so in real life it is beautifully shimmery with gold highlights.

Inside:

Inside are more papers & a label - all from the kit.

Card #4:

By now I was frankly getting a bit tired of working with this set, so I started really layering the elements from the kit to get them used up faster!  Everything here was from the kit.

Inside:

Inside was more of the same - the stamped sentiment in the label was from Christmas Cuties stamp set that came in my October 2019 Cardmaking and Papercraft magazine.


Card #5:

Most elements used are from the kit - plus black and white card stock.  Sentiment and small butterflies were stamped with stamps from JustRite's set called Be Strong. Butterfly die cut cut with a Spellbinders die from Nested Butterflies 2.


Inside:
 Inside were more elements from the kit and more black and white card stock.

Friday, July 17, 2020

Wonderland ACK Part 4


Today I have a couple more Christmas cards made with the materials from the Wonderland ACK (Artful Card Kit) from HOTP.  

Card #1 (above):  This card front was inspired by a sketch from a DVD called Theresa's Card Sketches (HOTP) and all materials except the ink used to ink the edges were from the kit.

Inside:

Inside is more of the same. The frame for the sentiment is also from the kit.  The message it self was stamped with a stamp from Mix and Match Christmas Blessings by JustRite (stamped & heat embossed).

Card #2:

This gate fold card makes use of several layered die cuts from the kit - along with a couple individual snowflakes from the kit.  The paper and sentiment are also from the kit.

Inside:

Inside is more of the same.  Paper from the kit along with layered die cuts, sentiment & border - all from the kit.

I haven't yet finished with this kit, but so far I have a total of 10 cards.

Tuesday, July 14, 2020

HD Paws for Thought - Cat-egorically Speaking


Today I got back to making cards from this lovely set.  I had already used quite a few pieces from the set (and after what I did today, I still have more left over), but I made several nice cards from what I had.  

Card #1 (above):  The focal on this first one is from the set.  The frame is cut from one of the concept cards that came in the kit and the ribbon was also in the kit.  The patterned card stock on the inside of the card is also from this set, but the rest is stuff from my stash: Kitchen Weave embossing folder (Cuttlebug) used on a craft colored card base, gold poster board for matting various elements, blue card stock scrap.

Inside:

Inside is a matted piece of adorable scoreable (AS - card stock from kit) and a removable bookmark that I had in my stash (made from scraps). I added the fussy cut sticker of a cat.

Card #2:

This card makes use of another cat focal from the set.  The craft card base is embossed with a Cuttlebug embossing folder (African Weave).  The AS & sentiment are also from the set (as is the AS used on the inside of the card.  The ribbon is from the set as well.  The little chipmunks are a fussy cut sticker from my stash.

Inside:

Inside is more AS and ribbon from the set.

Card #3:

It's a little hard to see all the detail on this card, but it started with a frame from the set that had lavenders in it.  I didn't have a focal to fit inside it, so went to my stash, found a sticker, and fussy cut around it for the focal.  The gold mat was cut and embossed using a die from Crafti Potential (Stitched Rectangles Dots & Stars).  The purple mat is glimmer paper that is embossed using a Cherry Lynn die (French Latice).  All of this was put on a cream colored card base that I sponged with gold Opal Polish.  The sentiment was another sticker & the ribbon is glitter velvet ribbon from my stash.

Inside:

Inside is another frame that didn't have a focal, more gold poster board and purple glimmer paper.  This time the purple piece was embossed with an MBossabilities embossing folder (Spellbinders - Elite).  A piece of AS was used on the inside of the frame, stamped & heat embossed with a JustRite stamp from the set called Celebrations One and Bracket Borders One.  

Card #4:

The fourth and last card made today has both the focal/frame piece, the border piece, and the inside sentiment all from the set.  The rest of the materials are from my stash.  I started with a card base that is tan on the outside and white on the inside.  To this I added embossed panels - peach card stock scraps from my stash, embossing folder from a Cardmaking and Papercraft magazine (Pawfect Pals - January 2020 issue).  Strips of gold poster board and a gold fleur de lis from my stash complete it.

Inside: