Please let me hear from you!

This blog is for sharing a love of paper crafting. You can also check out my Pintrest pages. If you find the ideas here to be helpful, I'd love to hear from you. It is what helps make the time I put into this blog feel worthwhile, and always brightens my day. I love hearing your ideas too!

(To leave a comment, scroll to the bottom of the post. You will see how many comments there are for that particular post. Click on the number of comments and the comment window will open. Also, if you want to add a link to something, follow the instructions at the bottom of this post.)

NOTE: If you click a link from the menu (below left) and are told the page does not exist, chances are good that it's a prepared post that will post at some point in the future, so be sure to check back!

You can also click this Pinterest Button to pin pictures in the blog posts.


Wednesday, December 28, 2016

Storage for Distress Ink Pads


Recently I shared how I made an ink pad storage box.  However, I outgrew it when I got several more distress ink pads.  I decided to make an ink pad holder specifically for Distress Inks and save the original box for the others.   I created the distress ink storage the same way as the previous one EXCEPT -
  1. For each small "cubby" I used a piece of card stock that measures 6 5/8" x 4 3/4".  
  2. Score each of the long edges at 7/8" from the edge.  
  3. Score each of the other two edges at 2 7/8" from the edge.
  4. Continue as for the previous one to make cubbys & glue them together.
I made my distress ink pad holder with 32 slots (4 columns, 8 high).  I had figured I'd make a little drawer to slide into the slot to hold sets of 4 minis, but I decided for the time being (until I have enough that I must consolidate the minis), to arrange my ink pads with similar colors in the same column - lightest to darkest.  For the minis, I created a "shim" to put in the back of the slot and keep the mini pad from sliding back too far where it would be harder to see & to reach.  I made these shims with scraps I had left over.  For each one:
  1. Cut a leftover piece to 3/4" by 9 1/2".  
  2. Score across this strip at 1 1/2", 4 1/4", 5 3/4" and 8 1/2", and creased each score line well.  
  3. Glue the first 1 1/2" part of the strip to the outside of the 1" strip at the other end, forming the edges of a rectangle. 
  4. This can then fit in the back of the slot so the mini's don't slide back too far.
After putting the first "shim" in a slot, I realized I wanted to make it easier to remove them if I rearranged my ink pads.  So, I took a small scrap (approx 1" by 1/2") and folded it in half to create a square.  I then glued one part of this to the inside of the middle of the shim, so it formed a "flag" sticking out from the front of the shim.  I could easily pull on this to remove the shim as needed.

Here's a picture of the shim before I added it to the slot:

Tuesday, December 27, 2016

Larger Stampscapes Cards


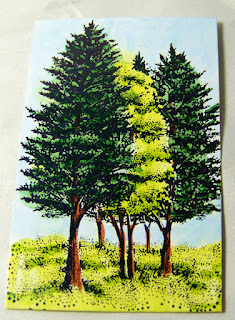
I had a Christmas Party to attend for which I wanted to take some Christmas cards - but didn't have a lot of time to make them.  I started by making these rectangular pictures (started with glossy card stock cut to 4 1/4" x 5 1/2") using Stampscapes stamps.  I created them basically the same way I did when making the small scenes for the snow globes (see this post).  I cut black card stock  to 6" x 4 3/4" and centered the pictures on one side of them.  I then printed a message on white paper that I cut and glued to the back of the cardstock.  While I varied them some, I made them in 5 basic themes.  You see one of these at the top of this post.  Here are the others:


I did try one like a sample the Stampscapes creator did in a video I watched, but decided not to do any more like it.  It was pretty, but more work than I really had time for:


I liked the way they turned out, but was afraid I would forget what I did by the time I tried to do something similar again, so here are my Coloring Hints:
  • Start by stamping images with black StazOn ink (other archival inks may work, but some of the others I've tried don't dry as fast and tend to smear a bit).
  • Finish adding color to the background before adding detail.  Otherwise things sometimes smear.
  • I like adding background color with distress inks & the round foam applicator from Ranger.  Other dye inks are okay, but most of the others that I have dry faster than I'd like.  You CAN add pigment ink over top, but be careful.  It doesn't dry or blend the same way and takes a long time to dry.  You might speed this drying time up with a heat tool.
  • For the background, start with lightest shade & blend from there with shades getting progressively darker & staying progressively closer to the edge.
  • Background colors can be added with Zig Scroll & Brush markers, but this works best over the top of the distress ink, and you must move quickly to blend it in.  Shadows can be created by adding a bit of marker at the darkest point & then blending out with your finger.
  • Dab bits of color from the markers to add shading
  • Often my pictures look a bit drab until I use the white marker to add spots of reflected light, snow, and/or stars.  You can soften the look (for instance on the top of rocks) by dabbing the white pen & then immediately tapping it or wiping it with your finger.

Thursday, December 1, 2016

DIY Ink Pad Storage


I recently bought some more ink pads & realized I was running out of room in the drawer I was using for storing ink pads.  I decided to make something to store them right on my desk so they would be more handy.  It was SO easy to make & SO handy to have them all at my fingertips!!!!

I made mine 8 high and 3 wide, but the size is up to you.  I wanted it to be able to hold any of my ink pads, so it is made to hold: Distress inks, StazOn inks, Brilliance Archival ink, VersaMark, VersaFine, Colorbox, and some dye inks from Ranger.  Here's a view from another angle:


And here's how to make it:
  1. For each small "cubby" you need a piece of card stock that measures 7 1/8" x 4 3/4".  
  2. Score each of the long edges at 7/8" from the edge.  
  3. Score each of the other two edges at 3 1/8" from the edge.
  4. Crease all score lines with a bone folder.  
  5. Cut along the red lines shown in the first picture below.
  6. Fold in the little flaps this creates.  
  7. Rotate card stock so that a 4 3/4" edge faces you (1/4 rotation from the first picture below).  
  8. Put double-stick tape on the outside edge of the two long flaps at the top.  
  9. Put double stick tape on both edges of the little flaps that have been folded in. 
  10. Fold the card stock to create a cubby like that shown in the 2nd picture below - long flaps with no adhesive attach to the flaps that were folded in, then the other long flaps attach on the outside of all of them.
  11. Then simply glue them together.  I glued 8 on top of each other so I had 3 stacks - then glued each stack to the next one to create my storage container.  
  12. To finish it up, cover the outsides with decorative card stock (I added ribbon along the top edges to hide the joins!).


Wednesday, November 30, 2016

Snowglobes Re-visited


Awhile back I made some snow globes using the matching stamps & dies from HOTP (you can see them here).  I need a lot of them for a party I'm planning and when I came back to make more, I had a thought.  Why don't I use my Stampscapes stamps to make scenes for the snow globes?  I LOVE how they turned out.

I started with a card made with the HOTP dies as I had done for the previous ones.  Then I used the die to cut circles from glossy cardstock.  I stamped the scenes with black StazOn ink - then colored them with a mix of Distress inks (added in a light circular motion using a round foam applicator from Ranger) and Zig Scroll & Brush markers.  I used a white Signo Uni-ball pen to add "snow" and "stars" in some of the scenes.

I used stickers for some of the greetings, and some I stamped with VersaMark & heat embossed with gold embossing powder (using stamps from JustRite's "Vintage Christmas Labels 1").

Here's a close-up of one of them:


And here's one I made with a less "Christmas" theme for a friend that doesn't celebrate that holiday:


I also made a framed picture by leaving off the snow globe base:


It IS circular, but the camera angle doesn't make that clear.

Thursday, October 27, 2016

Butterfly Thinking of You


This card used elements I had made ahead so that helped make the card faster to make since the focal elements were already mostly done.

Background: a pretty butterfly & daisy paper with blue background that came in a freebie pack with a paper crafting magazine.

Mat: Black paper cut using a Spellbinders die from the Fleur De Lis Rectangles set.

Focal: I started with white glossy card stock that had been inked with alcohol inks.   I cut it with a JustRite die from Vintage Labels 3. Next I stamped & embossed the frame on this die cut piece, using a JustRite stamp from For All You Do Vintage Labels Three. I colored it with a variety of inks until I got a color that blended well with the background paper.  For the sentiment, I used a stamp from HOTP Butterflies stamp set - heat embossed with black powder.  This piece was added with 3-dimensional foam tape.

Butterfly: The butterfly was a layered die cut I had in my stash, but I added inks to make a yellow-orange color that coordinated well with the rest.  After I got the color I wanted, I covered the whole with embossing ink & heat embossed it with clear embossing powder.

I don't have a picture, but for the inside, I used strips of the patterned paper with narrow black ribbon.  Then I stamped some framed sentiments using stamps from: HOTP "Tiny Tags, Little Labels & Greetings", JustRite "Cast All Your Cares" and "Be Strong".

Wednesday, October 26, 2016

Birthday Waterfall


This card was another challenge card, where I was supposed to make an interactive card using a chevron design.  At first I thought I'd use a chevron embossing folder, but then decided to create my own chevron look using strips of striped paper.  The trick was that because it was an asymmetrical stripe, I had to cut strips both lengthwise & crosswise to make it work.

I haven't made very many waterfall cards, but it really wasn't very hard.  I'll have to do more!  I followed the instructions on Theresa's 100 Moveable Parts Cards CD from HOTP.

The waterfall was created on small rectangles that had been cut with a Spellbinders Scalloped Rectangles die.  The various elements on them were from HOTP - most of them were transparencies, but they were from a variety of HOTP card making packs.


Tuesday, October 25, 2016

Gold Condolences


This quick card was for a timed challenge that called for using stripes & gold. 

Background:  This really wasn't a normal "background", but was instead washi tape from my stash that created a frame around the focal element.

Focal: The focal itself was die cut using a Marianne Cut & Emboss die, cut from cream colored glimmer paper.  This was backed with thin gold metal strips cut to fit behind the cut out parts of the focal.

Sentiment: The sentiment was stamped in gold ink using a stamp from HOTP Heartfelt Greetings stamp set.  Then I heat embossed it with gold embossing powder over top of the stamped sentiment.

Monday, October 24, 2016

Found Objects


I love the way this card turned out!  It was another for the timed challenges on National Card Making Day (PWMB).  This challenge was to use a found object from around the house.  My "found objects" were pink and purple sheer fabric that came on a couple of bouquets I was given.

Background: The background is a flocked paper from HOTP.

Focal: The focal was cut from cardstock with a Spellbinders die from their Card Creators "Stationary" die set.  This was covered with the sheer fabric - purple on top of the pink - only adhereing it with tape on the back.  As I taped it to the card stock, I pulled it gently taut - which meant the fabric floated a little bit above the card stock in the center. 

Finishing the Focal: Dazzles finished off the focal - the silver jewel border, the cupcake, and the sentiment - all are from various Dazzles sticker sets.  Because the fabric floats on top of the card stock, you get a really neat 3-D look for the sentiment.

Sunday, October 23, 2016

Thanksgiving Blessings


Here's another time-challenge card - this one was to use a barnyard animal.  The only thing I could think of was to use this stamp of cats. 

Focal: White cardstock cut with Spellbinders Card Creator die (Modern Stationary) & outlined with thin brown border Dazzles stickers from HOTP.

Focal picture: stamped on a patterned paper with brown ink & colored with markers - not sure who made the stamp.  I've had it for awhile.

Sentiments: Raised sentiment on green paper was stamped with brown on a green paper that had been cut & embossed using a Spellbinders Labels 20 die.  I used a brown pen to frame the green (running the pen along the raised embossed edge), and mounted it with dimensional tape.  The stamp itself was from JustRite's "Grateful Heart".   The other sentiment is also JustRite - this one from "Sympathy Vintage Labels".

Saturday, October 22, 2016

Fall Birthday


I made several card for timed challenges on the PWMB for National Card Making Day.  This one was in response to a challenge to use a stamp for the background. 

Background: Damask background stamp from JustRite on cream paper with brown ink. 

Focal: The pumpkin is a small stamp from HOTP colored with watercolor pencils.  The sentiment is a JustRite stamp from the set "Grateful Heart".  Corner treatments are from a Dazzles "Nested Frames Stickers" set in brown. 

Ribbon Treatments: Leaf ribbon from Paper Wishes, grosgrain ribbon from my stash. 3 little orange flower sequins finish it off.

Saturday, October 1, 2016

Christmas Flip


Today's card was made for a challenge on the PW Message Board.  It was made differently than other flip cards I've made, because it was made using the instructions posted on that thread.  It was made using the following supplies:
  • Card Base: double-sided card stock from DCWV.  Stripes were enhanced using HOTP Dazzles - Black Thin Lines, Black Jewel (silver edge cut off & remaining used for flower centers), and Camera (which was placed on top of a piece of ribbon from my stash. Though you can't see it in the picture, the card base is cut & the portion that extends past the front fold is flipped out.
  • Focal: Mat cut using "Antiques Labels One" die from JustRite & outlined with a black Sharpie. Focal itself is from HOTP Ebony Color Me Christmas Greetings Topper pack - colored with red Gelatos.  
  • Inside: Mat is cut from black paper with same die used for mat on the front.  I fussy cut the cream-colored inner piece.  The message is stamped with stamps from JustRite's "Mix and Match Christmas Blessings", except for the signature which was done using an embossing pen.  The whole was then heat embossed with Garnet PEARLuster embossing powder.

Friday, September 30, 2016

She gave ALL


This page is discussed here.  This is how I created it:

1) Scribbled a bit of "Metallic Blueberry" gelato on a craft sheet, thinned it with water using a water brush, and brush on to the page.  Colored it with a light coat - all except the verses I wanted to highlight.
2) I typed up the words on my computer, finding fonts that I wanted to use - then printed them.  Also, I printed a pile of coins I found on the internet.
3) Using my ultra thin light box, I traced these words & coins onto the page using a Staedtler triplus fineliner black marker/pen.
4) Next, I drew in my "two small coins".  I colored the small coins copper using Silks "Harvest Sol" acrylic glaze.
5) I used "Gold Lame" Smooch ink to color the other coins, the words "ALL" and "shine lines" coming from the small copper coins.
 

Wednesday, September 28, 2016

Me and My House

This Bible journaling piece is fairly simple.  To read about it's inspiration, check Me and My House on my other blog.  I started by preparing the page with clear gesso (Art Basics) as usual.  The rest is just some lettering & a house illustration:

House Illustration:
  • Stamped using my navy Scroll & Brush marker to color the house stamp (from HOTP "Welcome Home stamp set.
  • Colored with gelatos - scribbled on my craft sheet, made into a "paint" & painted with a water brush.  The blue used 3 colors - one a shimmery one.  I also used the the dark yellow.

Words:
  • I created a mock-up on my computer using fonts I liked - then traced them using the fine tip of one side of the "scroll" part of the Navy Scroll & Brush Marker.
  • "Choose Today" words were colored in using gelatos as for the house illustration.
  • Reference & date added with a fine-point Sharpie.
The other thing I did - which you can't see in this picture - was to highlight the text itself using the same yellow gelato solution used on the house & "TODAY". 

Thursday, September 22, 2016

House Pivot Card


Here's a card I made sometime back.  It's not really finished - waiting to add a sentiment when I decide when I'm going to send it.  But, I did want to record it here before I completely forgot what I did.  The card was made using the House Pivot die from Elizabeth Crafts, as well as pieces from their Holiday House die.  

I cut a piece from camouflage paper for the ground.  I found a branch cutting die I had & used multiples of it to create some trees. Parts of the house are cut from various papers, and parts were colored with smooch ink.  Flowers are small paper flowers with Jewel Dazzles centers. 

Here's the front of the card - you can see I've left space for a sentiment in the upper left corner - and added a Dazzles butterfly to the bare tree.


Wednesday, September 21, 2016

Snow Christmas 2


Here's the second card - using the same paper & Color Me pack of card toppers as the card posted yesterday.  I colored them in the same way, using Scroll & Brush markers & baby wipes.  A little bow finishes the look.  Here's the inside (cut from around the piece on the front):


Tuesday, September 20, 2016

A New Creature


Here's another Bible Journaling page.  This one uses Stampendous Pop-Up Kitties stamp set.  Here's what I did:
  1. Applied 3 thin coats of clear gesso (Art Basics) to the page to prevent bleed-through.  
  2. Stamped the kitty at the bottom using black VersaFine ink.  I forgot to mask so the upper part of the kitten's body wouldn't show on the face, so I used a little heavy white gesso to cover the extra stamped lines that I didn't want.
  3. I printed the text onto a sheet of scrap paper and then copied it into my Bible using a light box (this thin one works marvelously for this) and a Zig marker with a fairly thick tip.  
  4. Using a fine-line Sharpie, I added the text reference and date.
  5. Next, I colored the cat in using my pastel chalk set, coloring a bit like I did here (though I didn't need to go back over the stamped lines again).
  6. After the cat was colored (all except her eyes), add added green chalk to the rest of the page for a background.  Then, before the chalk had a chance to set, I erased the chalk from covering the verse itself.
  7. For a finishing touch, I combined two Smooch inks (green & gold) to make the cat's glowing eyes.

Monday, September 19, 2016

Snow Christmas 1


Here's the first of a couple of Christmas cards that were made using HOTP's Color Me Snowflakes Card Toppers. I colored them with Scroll & Brush markers - faded out using baby wipes.


For the inside, I added strips of patterned paper (including from HOTP), and Dazzles borders.

Sunday, September 18, 2016

Stampscapes 6


This Stampscapes ocean scene is 5 1/2" by 8 1/4" - once again on glossy card stock, stamped with StazOn, and Scroll and Brush markers.  This scene made use of several types of stamps - from ocean to lakes & streams to people, animals, and birds, to sky stamps.

Saturday, September 17, 2016

Stampscapes 5


Here are two scenes that started with the same base stamp - Country Stream (small one in the scene above - large one in the scene below).  This top one adds foliage & water stamps along with a canoeist & some birds. 


This one added trees, trees & hills, and a buck.  Both scenes were stamped with StazOn on glossy card stock - colored with Scroll & Brush markers.

Friday, September 16, 2016

Stampscapes 4


Moving into Stampscapes scenes, this first one started with the waterfall stamp.  The addition of sky, rock, trees, & a hiker came together to create the scene.  As before, it is stamped on glossy card stock with StazOn ink & Scroll & Brush markers.


Thursday, September 15, 2016

Stampscapes 3


Here I was playing with a stamp called "Country Road Small" as a base, adding trees, a person with a dog, birds, and clouds.  I used the same technique - glossy card stock, black StazOn, Scroll & Brush markers.  I used a small portion of the clouds stamp to add texture to the path forground.


This longer one is about 11" long.  It started with the "Country Road Small", added "Trees & Hills", along with birds, buck, and trees.

Wednesday, September 14, 2016

Stampscapes 2

Today's Stampscapes scenes started with a single stamp - colored & enhanced with a few little stamps.  Once again these were stamped with black StazOn on glossy card stock - colored with Scroll & Brush markers.


Tuesday, September 13, 2016

Stampscapes 1


I recently got some Stampscapes stamps.  I've been wanting these for a long time, as I love the variety of scenes that can be created with them.  But today's examples are of a few single stamps, stamped with StazOn onto glossy cardstock & then colored with my Scroll & Brush markers.  Sometimes I used the markers straight, sometimes I added a dash of color & then wiped with my finger to spread the color & create color that was less intense.  A combination of these techniques - along with using various colors, gives me a start of creating depth in my images - though some are better than others.


Monday, September 12, 2016

Background Techniques


Today's post is all about playing with a background stamp (JustRite - Lace Background Stamp).  I started out trying the Black Magic Technique I saw here.  My first try (as you see above) turned out to be a much more "distressed" look than intended.  Next time, I would be sure to use a stamp buddy to prepare the surface before stamping and adding the clear embossing powder.  But, the technique was fun.  I started with a piece of card stock, colored it with distress inks, and then stamped using a background stamp, embossing ink, and clear embossing powder.  After heating the embossing powder, I used black ink over top of all - rubbing it in - except where it didn't stick to the embossed areas.


This next example was done in a similar way, but the black showed so poorly that I tried rubbing in some Silks Acrylic Glaze. This took off the black ink & the resulting pattern was interesting.


My last example dispensed with the black ink entirely. This one was done on glossy card stock.  I colored the background with distress inks, and then stamped/embossed with fine black powder.

Saturday, August 27, 2016

Easel Card with 4 Drawers

Today's card was inspired by a challenge on the PW Message Board, though I created it more like I saw on this video.  It's an easel card, with 4 drawers - one on each side.  I plan to add some goodies to the drawers for her birthday, but figure that later she can set it on her desk & keep little things like paper clips & stamps in it. The card itself is 6" square by 1" tall when closed up. 

Materials:

  • Printed cardstock - animal print - 2 pieces that are 6" X 6" (these form the very bottom of the card, and the top part of the easel that you see the cat on), and 4 pieces that are 3 1/2" X 8" (scored at 1", 3.5", 4.5" & 7". These are folded and glued together to form the casings for the drawers.)  Here's one of the drawer casings before it was added to the card base:
  •  Printed Cardstock - striped - 1 piece that is 6" X 12" (scored at 6" & 9" to form the rest of the easel card - which is also the top cover over the 4 drawers), and 4 pieces that are 4 3/8" X 5 3/8" (scored 1" from each edge - forms the drawers)
  • Acrylic Glimmer Paint (Gleams by Decca) - Painted the inside of the drawers with this so they would be cream colored rather than stark white - and thus better blend with the rest.
  • 4 triangular black beads and 4 smaller black beads - for drawer handles - sewn to drawer fronts with black embroidery floss and then glued in place (craft glue) to hide knotted ends & adhere the beads even more securely.
  • ATG Gun - to attach everything together
  • Pink Glittered Fun Foam (from dollar store) - used to cut rug cat is sitting on, bow for cat, flower parts, swirl embellishments & name.
  • Silver mirror metallic card stock - for behind cat
  • Cat (head attached with wobble spring, see how cat was made in previous posts - here & here)
  • Chipboard Letters (for name - holds easel in place - I cut glitter fun foam to go on top of them)
  • Spellbinders Dies - Modern Stationary Cardmakers Die set (for silver behind cat), Scalloped Petite Ovals (cut one side & then the other, to create a narrower oval than is in the die set)
  • HOTP Dies (Paper Artist) - 12 Flower Frenzy (for swirl), 10 Tiny Things & Shadows (for Flowers - this post talks about how I made these)
  • Happy Birthday Die Cut (not sure where I got this - probably in a swap)
  • Hot Pink Stickles - The die cut wasn't the right color so I covered the "Happy Birthday" with pink stickles to match the fun foam.

Here are more pictures of this card:
Front of Card when Closed

Card Opened all the way to see the "Happy Birthday"

Card as it would look when sitting on her desk