Please let me hear from you!

This blog is for sharing a love of paper crafting.
In fact, I love paper crafting so much that I became an independent Stampin' Up!®™ demonstrator!
(I LOVE their products!)
Full disclosure: I get a small commission on purchases made using links from this website - but this in no way affects your price. It just serves to help support this blog. Thank you in advance for that support!

Enjoy browsing my blog, and I'd love to hear from you.
It is what helps make the time I put into this blog feel worthwhile, and always brightens my day.

To leave a comment, scroll to the bottom of the post. You will see how many comments there are for that particular post.
Click on the number of comments and the comment window will open. (Your comment will not appear immediately because I moderate all comments to avoid spam.)

NOTE: All Stampin' Up! Images © 1990–2025 Stampin’ Up!®

Tuesday, June 25, 2024

Embellishment storage - and more embellies

I got some questions about embellishment storage, so decided to show my system here - along with a few more embellishments I've made recently from new dies.

As you can probably tell from the picture above, I store my embellishments in sheet protectors in a 3 ring binder.  Most of them fit in protectors designed for baseball cards - like you see in the picture above.  I find if I cut a piece of paper to fit in each, I can then put embellishments on each side and see them clearly.  I DID find that some things I made were too large for that size of sheet protector, so I added some protectors that were designed to hold photographs - I think these are for 4 x 6 size:


This last page shows some of my most recent embellishments:
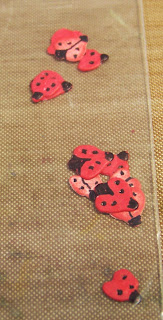
These are from a Spellbinders die set called Winter Evergreen Foliage & Ladybugs.  The foliage is pretty large, ranging from approximately 2 1/2" to 4 1/2" in length.  The ladybugs, on the other hand, are tiny - smaller than my pink fingernail.  I have learned that for some of these small embellies, it is best to put them in a 2" x 3" little zip lock baggie before putting them in the book.

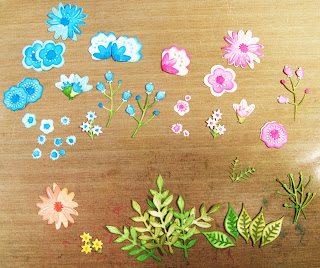
I also made some flowers from the Spellbinders set called Simply Perfect Layered Blooms.  Here's a quick look at some of those.

I had intended to make a set of blue, one of pink, and one of yellow/orange, but when I went to start coloring my second set of flowers, I mistakenly grabbed the blue again and had almost all of them colored before I realized my mistake!  So, I have quite a few of the blue ones!

I sure wish I had thought to do this with my Seahorse Gardens, Under the Sea, and Water You Up To? sets!  Those would be nice to have!

No comments: