.jpg)
I had some fun the other day playing with waxed paper, and you see the result in this picture - lots of fun colors and patterns.
I cut my waxed paper to fit my embossing folders and ran them through my Grand Caliber. Here's a piece of embossed waxed paper (on a dark background so hopefully you can see it):

I cut white cardstock to the same size - twice as many pieces as I had waxed paper pieces. Then I sandwiched the wax paper between two sheets of white cardstock and ironed it with a hot dry iron for a few seconds. The wax came off onto the cardstock, creating a resist. Then I added color - wiping it off the wax-resist area. I used two different techniques:
First, I used glossy cardstock, sandwiching the waxed paper so that the glossy side of both were facing toward the waxed paper before ironing. In other words, I had a glossy piece facing up, then the wax paper on top, then another glossy piece facing down - creating a cardstock-wax paper sandwich.
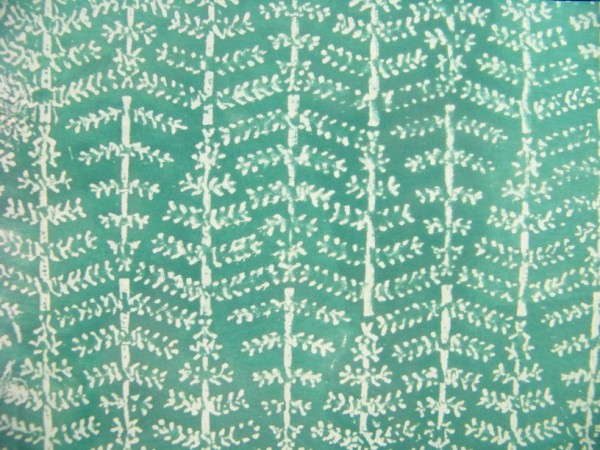
With the wax resist on my glossy cardstock, I colored them with distress inks - wiping the pad directly onto the cardstock, then wiping with a paper towel to clear the ink off the resist. Some pieces were colored with just one color - this one was called "pine needles":
With the wax resist on my glossy cardstock, I colored them with distress inks - wiping the pad directly onto the cardstock, then wiping with a paper towel to clear the ink off the resist. Some pieces were colored with just one color - this one was called "pine needles":
On others I combined several colors. Here I used 3 colors - worn lipstick, broken china, and dusty concord:

Of course you can't see the shine very well, but in person, the gloss of the cardstock is certainly visible.
You never know how the pattern will turn out. Sometimes the pattern is quite similar to the embossing folder - as with the green one above. Others turn out quite differently. The 3-color one above, for example, was made with a simple dotted embossing folder.
The second technique I used started with plain white cardstock - not glossy. I ironed these as before, and then colored them with various ink sprays - wiping them with paper towels as before. This one was done with Glimmer Mist:

Naturally, it's not easy to see the shimmer in the photo, but it's there in person.
This last one I'll show was sprayed with Walnut Ink:

It looks a bit shiny in the picture because of the way the light was hitting it, but in person you can see it is really not.
Combine this technique with what I shared yesterday about making glimmer sprays, and I can make lots of fun patterned paper really inexpensively. What fun!
1 comment:
Cheryl, What a cool idea! I never thought of using wax paper. I'm going to give it a try. Thanks for the inspiration!
Post a Comment