
As I was playing with paper napkins, I checked out a few YouTube videos. I came across one that showed using various glues and decided to try it. It showed using various glues on a craft mat - apply glue to mat, lay down napkin, apply glue on top, let dry, peel off mat.
(I've just spent an hour looking for the video I saw and I can't find it! If I find it, I'll add a link here. ) In my looking, I came across this one by delygirl1961. It shows using much less glue than I did - would probably work better. Another one by Kellie Colegrove showed that fabric stiffener might work even better.)
At any rate, I hadn't seen those when I tried this technique, so I just used cheap school glue. Here's what I found out:
1) Cheap glue seems to work well BUT - you want the glue to be pretty thin - mine were WAY too thick & took FOREVER to dry!!!!
2) The side closest to the craft sheet dries glossy, the top side dries to more of a matte finish. I might have preferred putting my napkin face side down so the glossy side was the front side.
3) Too much glue and it dries more opaque - not the translucent look I was going for (see 2nd card below.)
Anyway, here are the cards I made using this technique. The first piece was somewhat translucent and I wanted to play up that look. So, I cut a hole in the front of my card & covered it with the napkin. I then glued a die cut from a Spellbinder's die on top. The card front was finished with a "Color Me" tag from HOTP that I colored with Gelatos & heat embossed the "Thanks" in copper.
You really can't see from the picture, but in real life, you can somewhat see through the center part. On the inside, I layered the pieces cut out of the center of the brown & the card base.

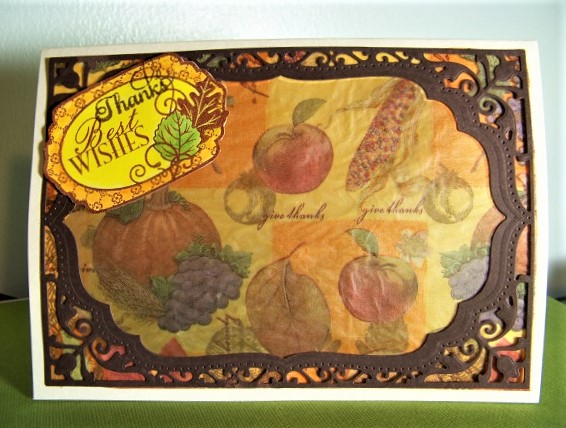
For my 2nd card, the napkin piece was not at all translucent. So, I fussy cut around it & glued it to the front of my card. The frame is cut with a couple of Spellbinders dies. The "background" is really just a border pieced together from napkins and glued in place. The sentiment was stamped with a JustRite stamp.

No comments:
Post a Comment