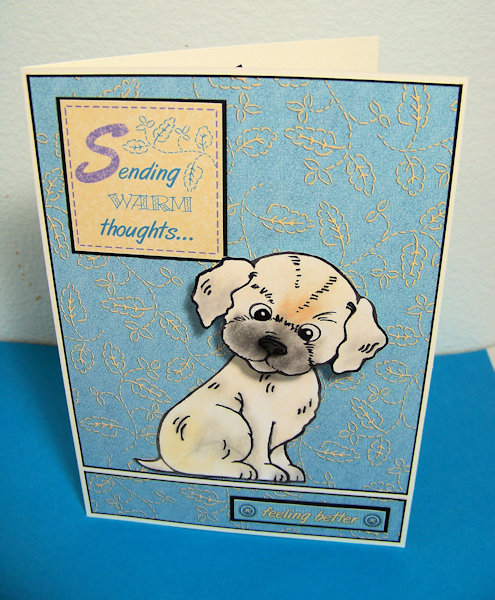
Today's card is another one made from coordinating papers & artwork from the "Cardmaking Value Pack #2" (HOTP). Once again, it looks nothing like their samples - though it uses their printed sentiments & patterned paper. This one is a "get well" card for a friend who loves dogs.

CARD FRONT:
- Background: I started by cutting a piece of patterned paper just a bit smaller than the cream-colored card base. Then I cut about an inch off the bottom, trimming it a bit to fit as you see here. I created the look of a black mat by drawing around the edge with a black Sharpie.
- Focal: I made the puppy pieces some time ago using the "Pop-Up Puppies" Stamp & Die sets from Stampendous. You can see more about how I did it here. For this card, I placed the body where I wanted it, then added the head with an "Action Wobble Spring" from Hampton Art.
- Sentiments: The sentiment pieces were artwork from the kit - I just matted them on black paper and added them as you see here.

INSIDE:
- Background: I left most of the cream from the card blank showing - just added another piece of the patterned paper near the bottom (outlined the same way as I did for the card front).
- Dog Bone: This was another piece I had created earlier using the Pop-Up Puppies stamp & die sets. All I had to do today was glue it in place.
- Sentiment: This time I used their printed sentiment with lots of layers. I first layered it on a piece of patterned paper, then black for a mat, then another piece of patterned paper where I ran a Sharpie around the edge. (The bottom mat is actually pieced together from two narrow strips since I was almost out of this paper by now.)
No comments:
Post a Comment