For some time now I've been enjoying working with stamps that have matching dies. For quite awhile, though that has been JustRite stamps where several different stamp sets match their label dies or Spellbinders Label dies. For those my current storage system worked great with stamps stored in one place and dies in another - because I often used them separately or together with a variety of others. Recently I've been getting more sets where the stamps and matching dies aren't likely to be used for anything else - dies to cut out stamped birds, cats, dogs, etc. As I started working with these steps, I realized I REALLY wanted these stamps and dies to be together (along with the stencils that came with some of them.
My solution is to use the old-style packaging from Spellbinder's dies. I had kept these figuring the acetate would come in handy for projects - never expecting to use them this way! If you don't have several of these lying around your house, perhaps what I did will spark another idea for you!
I started by taking the empty Spellbinders plastic packaging and trimming around the edge - leaving as much as possible and still get the two halves apart. I then flipped one side over and stapled them back together along one long side and the short bottom. This gave me a clear plastic container that was perhaps 1/2" deep, with the top and one side open so I can easily access the contents. You can see it lying sideways in the picture below.

This picture also shows my 3 sets of items that all fit into this particular package of stamps, dies & stencils from Stampendous called "Bird Blossom":
- The stamps - For these I trimmed the clear plastic that the stamps were sandwiched between to make it 4" wide so it would fit inside the package. I rearrange the stamps and outlined each with a permanent marker so I could make sure I got all of them back in the package!
- The stencils - These are in a business-size envelope. I had to cut the sheet in half (okay a rather crooked half since I made sure to cut carefully between the stencils knowing I might want to use the outlines as well as the "innies". I have also added any additional "Post-it stencils" that I've made to use with the set.
- The dies - for these, I attached some stickybacked magnet to a piece of cardboard (in this case, it was the piece out of the stamp set that I cut to 4" wide (I save the one from the dies in a book that allows me to quickly leaf through and see all my dies).
After preparing these pieces, I just slip them in the package with the dies facing one side of it, the envelope between, and the stamps facing the other side. (Make sure the cutting edge of the dies is facing the packaging to help ensure there's no chance they'll cut into your stamps!) Here are a couple of pictures so you can see each side of the package when it's filled.
First up is the side with the stamps. You can see the envelope behind them. It's hard to see, but at the top of the package, I've written the name of the stamp/die set.

This side shows the cutting dies on their magnetic cardboard backing.

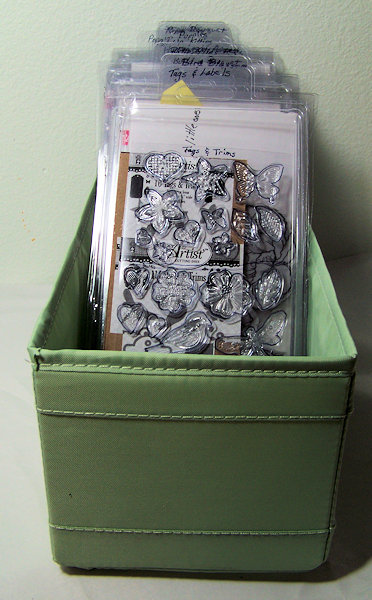
I have an open container on my desk that is the perfect size to hold these stamp/die sets (see picture at the top of this post).
No comments:
Post a Comment