Wow! What a fun and busy WCMD marathon! On the message board I frequent (
https://paperwishers.freeforums.net/), there were SO many challenges for WCMD that completion spilled over to the next day! It was great fun. On WCMD proper (Oct 5) I made 10 cards for challenges on WCMD. You can look for the WCMD Marathon Part 2 for the cards that were made on the next day (Oct 6) - some for fewer points, but they still counted. For now, here are the 10 cards I made to meet challenges on the first day.
Card #1:
The first challenge of the day was pretty easy - make a card using a tag for a focal. When I went looking through my tags, I found this fun one that I had printed from a freebie download some time ago - no clue where at this point. I embossed a piece of aqua card stock using a Darice embossing folder called Snowflake Swirl. After inking the embossing & edges with silver ink, I wrapped the embossed panel with a 1/4" black ribbon & a 1/8" red one before adhering it to the card front. I matted the tag with red, then black and glued it in place. Finally, I added a little die cut gift (from Spellbinders Gnome Drive Holiday die cut set) and finished with a triple bow at the top of the tag (3 1/8" ribbons - black, red, aqua).
Card #2:
Next up was a fun challenge called "mystery stamping event". Every 15 minutes we were given instructions (or additional instructions) that we were to implement before the next instruction came due. Over the course of the next 1 hour and 15 minutes, we were given 5 instructions that told us what we needed to do to create the card you see above. The only thing we weren't given specific instructions about was our embellishments. We were simply told to embellish as we pleased. The flowers and greenery that I added were ones I had made ahead using dies from Spellbinders Tropical Friends die set (May 2024 Small Die of the Month). It was a fun activity and I was please to finish with another pretty card. Sentiment stamps used were from Crafter's Companion's Rainy Days set.
Card #3:
Next up we were to choose a number from 1 to 4 and private message the organizer with our pick. She then let us know which "destination" was to be the inspiration for our card. My pick turned out to be Paris. Honestly, when I was given Paris as a focus, I figured it would turn out to be a card I couldn't use. Fortunately, I was wrong. I found this paper & the focal picture in a HOTP set of papers and cutouts called 8 x 8 Vacation. I found a little sticker of a French girl saying "bonjour", put it on a piece of card stock & fussy cut it, then put it on foam tape where you see it near the Eiffel Tower in the focal. I found the perfect strip sentiment and die cut "hello" in my stash and added them to complete my card.
Card #4:

This card was the hardest for me by far. We had been given a list of different things to pick from in advance - one of this, two of that, etc. Then, on WCMD, we were told what we had "picked". The requirements for mine were quite challenging - using things I don't like to use like buttons and chip board, but limited supplies of other things and worst of all, I had to use a sketch. Since one of my "picked" requirements was that the card be a gate fold card, finding a sketch was challenging. At any rate, this was my completed card for that challenge and I was GLAD to have it behind me. I embossed the card stock using a Darice folder called Brick Wall. The "h" and "b" were the chipboard elements (the rest of the words die cut using a HOTP die set), and the flying witch was die cut from flocked suede paper (Temu die). The buttons were put on the "O's" of the added "Boo". That, the witches hat, spider web and spider all came from a Halloween paper/die cut set my niece shared with me.
Card #5:
These next four cards are from what I think may have been the most fun event of the day. Ahead of time we had been given a list of snack foods and told to choose. Each "food" would represent things we needed to include in our card. What we didn't anticipate was that we got one more point for each that was pictured with it's chosen snack food. (Which, of course, meant that we had those snacks available for a quick "pick me up" when our energy started to drop!) This first was "Chocolate". It was to have 1) brown card stock, 2) rectangles, 3) something with foil. The 3 focal pieces & sentiment were from a Hunkydory Pop-a-Topper called Ladies Choice. Embossing folder was again the Darice Brick Wall.
Card #6:
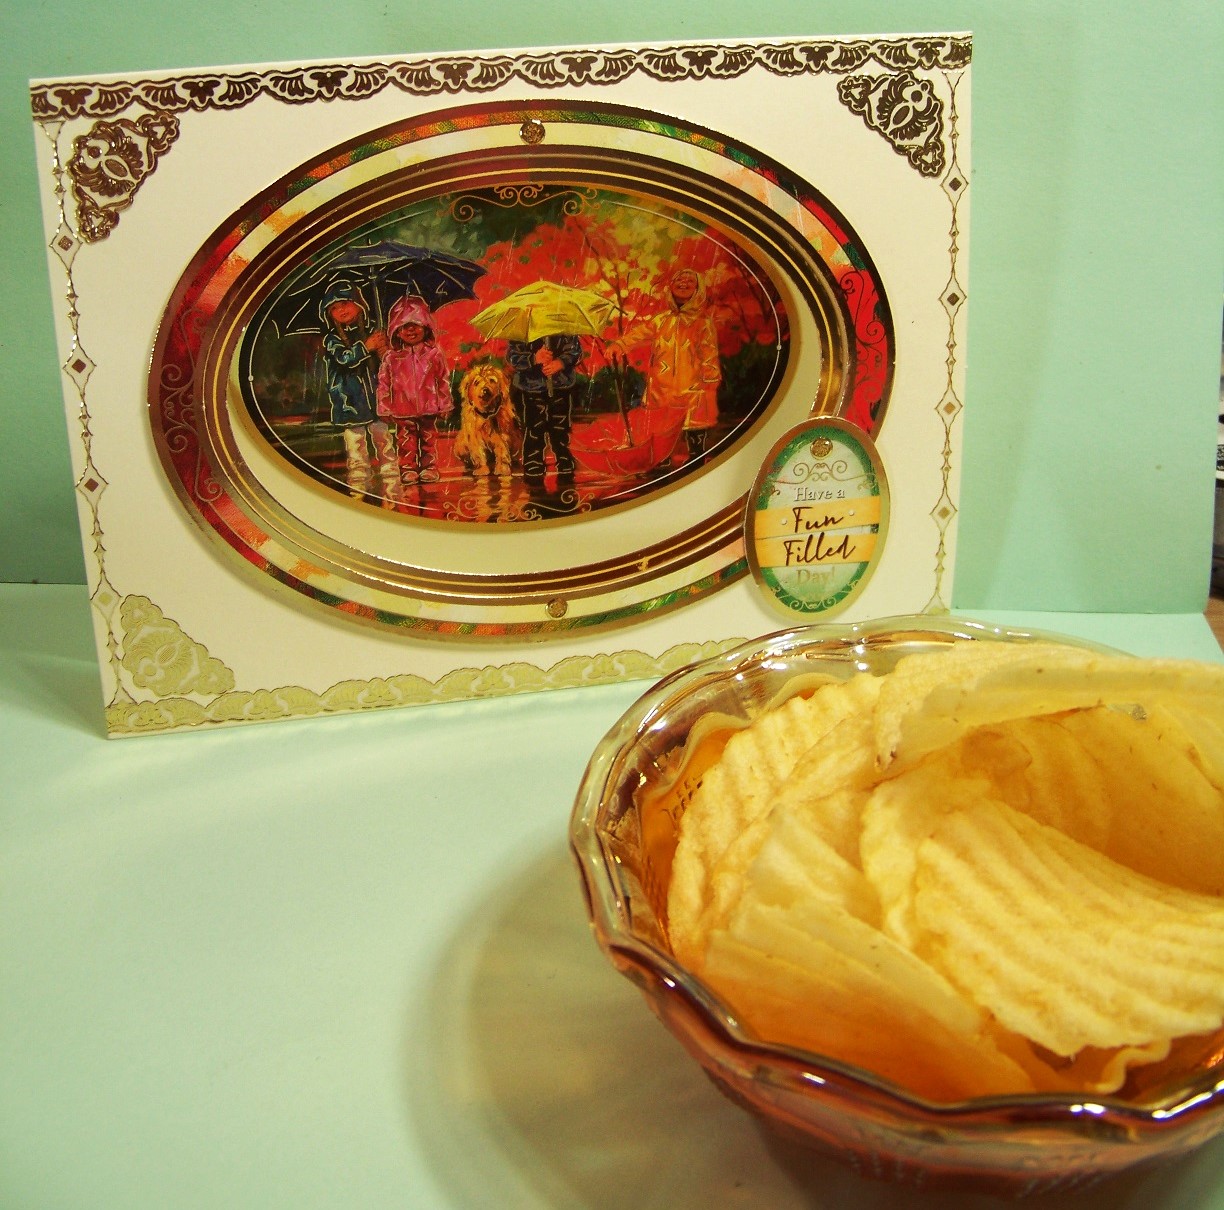
This "chips" card was to include 1) cream colored card stock, 2) ovals, and 3) glitter (little dots on the frame). In addition to the cream card stock used for the card base, I used pieces from a Hunkydory kit called Childhood Dreams - the set called Let's Make Memories, and border/corner stickers from HOTP.
Card #7:
Next up was Ice Cream. This one needed to have: 1) white card stock, 2) circles, 3) sequins or enamel dots. Since I didn't have any of the latter, I used stickers that resembled them (HOTP Jewel Dazzles). The white card stock again formed my card base - also mat layers for my sentiment (one of them inked to a gray/black) and the sentiment itself. The die cut mat was cut using a die from Spellbinders Splendid Circles set. The background paper and focal were from a Hunkydory Papers and Inserts set called Happiness Is. There's also a scalloped mat immediately under the sentiment that was punched from silver glimmer paper. The sentiment itself is one from Sassy's LLC.
It's so much fun to have die cut pieces ready made so I can pull them for a quick card as I did for this one (from Spellbinders Backyard Haven View set of dies.) The requirements for this "Popcorn" make were: 1) Cream colored card stock (used for the card base), 2) Circles, and 3) puffy stickers. I had very few puffy stickers, but found a set in my stash that had little flowers and butterflies. I immediately remembered this die cut tree I had made that had little flowers that COULD go in it. I thought the puffy stickers would similarly work well, so this card was born. The blue background is a piece of wallpaper. The "ground" was a patterned card stock in my stash. I just tore the edge and glued it in place. I've already mentioned the puffy stickers. The rest except for the sentiment and the butterfly "trail" were all die cuts that I'd made ahead from that spellbinders set. The butterfly trail was scraps stickers, and the sentiment was one from Sassy's LLC. I inked the edges and matted it on a scalloped circle that I punched from the same card stock as the card base.
Card #9:
For this challenge we had all been asked to post a favorite card we found somewhere on the internet. Then we were told to choose someone else's favorite and base our card on that. The card I chose had a focal that had 3 penguins side by side on the front of the card. Since I had just made the previous card, I had blue wallpaper sitting in front of me, and my embellishments book opened to die cuts I had previously made and put together. This card was what resulted. As you can see, I matted the background wallpaper on black before adding it to the card. The sentiment was one I stamped (Sending Sunshine Sentiments stamp set from Spellbinders) on a strip of white paper, cut the ends (with a punch from Stampin' Up), and matted it on black before adding with dimensionals. The remaining elements were all die cut from Spellbinders Up In the Air View.
Card #10:
This was my last card for the day. We were to make a card where the focal element started with a W or C or M or D (in honor of World Card Making Day of course). I made a D = Dragonfly card with all elements from a Hunkydory kit called Animal Kingdom. The set was called All My Love, and everything you see was from that set - the background, the focal, the frame, and the sentiment. I guess that's not quite right. The background was matted on gold tag board from my stash. As you may be able to tell, the frame and sentiment were matted with foam tape for dimension.