Today I have more cards from Hunkydory's Paws for Thought - The Cat's Whisker's set. Most of the die cuts were already gone - used on previous cards. I apparently only got a picture of one of those: here, though there have to have been more of them. Anyway, I'll call this card #2 since we know I got one previously. The cards in this post were made with the two pieces of adorable scoreable card stock (AS) from the set - most of which had not been used. I also used the remaining die cuts and misc die cuts from other sets that were left over.
Card #2 (above): This card uses a piece cut from the lower border of the AS - pieced with a narrow strip cut from the upper border. The focal was printed on the AS. Dazzles create the greeting and similar stickers form the edging around the card.
Inside:
For the inside, I added a strip of scrap from the die cut sheet that would coordinate fairly well with the card front - and bordered it with more of those stickers used on the card front.
Card #3:
The 2nd piece of AS had this cute little cat on it, so I once again cut it so I had a piece of the top border added to the piece from the bottom border. This time, after inking the edges, I ran a sheer ribbon across the join, and added a bow, and a sentiment before gluing to the card front.
Inside:
As you can see, I took most of the rest of the borders from this AS sheet to finish the inside of the card.
Card #4:
This card made use of the remaining section of the first AS that still had a border. As you can see, after rounding the corners, I matted it on gold poster board. I also added a couple strips of the poster board to enhance the borders & form an anchor for the focal (from another set in this kit). The sentiment was die cut from the same gold poster board using a die from the Octagon Box Kit from Card Making Magic.
Inside:
Once again I've used a small piece of the gold poster board for the border at the bottom and for the sentiment. Again, the die was from Card Making Magic - this time the A5 Box Kit.
Card #5:
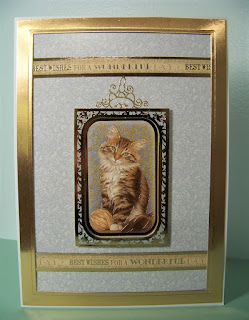
The background is most of the remaining AS - this time framed with gold poster board (die cut using Spellbinders 5 X 7 Matting Basics). The focal was from another set.but the sentiment border was from this one. I added a lacy sticker to serve a s a "picture hanger".
Inside:
Leftover strips of AS, die cut sheet scraps, and gold poster board form a border for the inside of the card.


No comments:
Post a Comment