Please let me hear from you!

This blog is for sharing a love of paper crafting. You can also check out my Pintrest pages. If you find the ideas here to be helpful, I'd love to hear from you. It is what helps make the time I put into this blog feel worthwhile, and always brightens my day. I love hearing your ideas too!

(To leave a comment, scroll to the bottom of the post. You will see how many comments there are for that particular post. Click on the number of comments and the comment window will open. Also, if you want to add a link to something, follow the instructions at the bottom of this post.)

NOTE: If you click a link from the menu (below left) and are told the page does not exist, chances are good that it's a prepared post that will post at some point in the future, so be sure to check back!

You can also click this Pinterest Button to pin pictures in the blog posts.


Tuesday, December 29, 2020

Birthday Owl

This card started with an embossing folder called Brick Wall (Darice).  I had an A2 card that I had embossed with it sitting on my desk - waiting for inspiration.  There was a challenge on a message board that I frequent to apply ink to the card in some way - embossing folder being one of those ways.  I decided that would be a good way to use this card.  But I needed a focal - and a birthday card for a niece who likes owls.  I thought of the Shabby Chic Owls download freebie I had gotten from Debbi Moore.  It would be perfect! 

Card front (above):  I decided on this cute tag for my card front, and looked for ink that would be close in color - it turned out that the distress oxide called "Iced Spruce" was my best choice.  I inked up the embossing folder with it - taking the ink pad directly to the embossing folder - and then ran the card through a second time.  I didn't like the way the ink looked around the edges, and I decided that brown matting would help it look better, so I decided to trim the piece and put it on a 5" x 6.5" card.  The tag really needed to be matted as well & I added a border strip of the brown to which I could "attach" the tag.  The "Warm Wishes" greeting & mat were made with dies from the Octagon Box Kit from Card Making Magic.  The little "birthday" flag was from my stash - not sure where I got it.
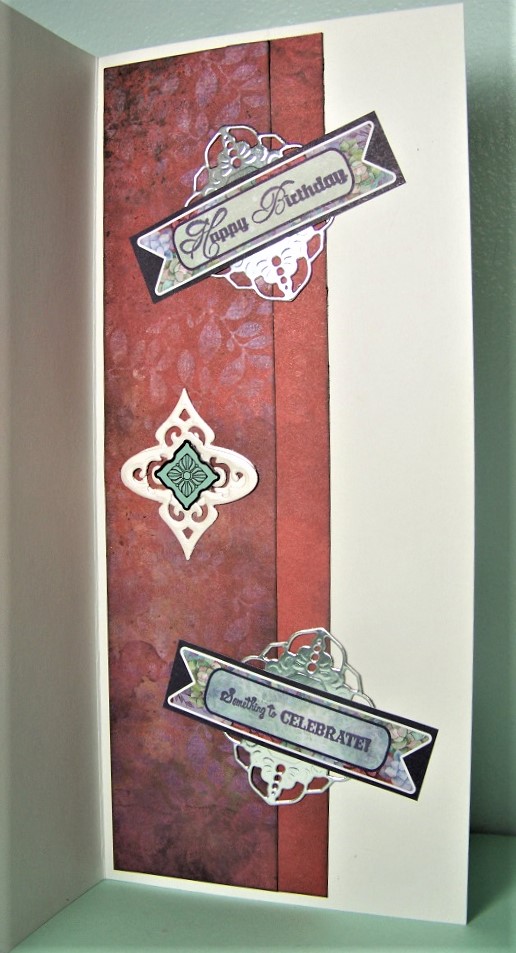
Inside:

Inside I used more of the brown card stock to form a wide border at the top. I cut a piece of white card stock (left over from the original A2 card I started with), rounded the corners, inked the edges, and stamped my sentiment (Birthday Cheer from HOTP - ink was Vintage Photo distress ink).  That, plus another owl, I had printed from the Debbi Moore set completed the inside.

Monday, December 28, 2020

Thank You Kit Cards

These cards were made using home-made "kits" I had put together using leftover pieces from other kits and papers that I had put together.   

Card #1 (above): When creatign this kit, I took a die cut from a HOTP set, tags and small butterflies from another HOTP set, and several papers that coordinate.  I created a background using the pink paper I had put in the kit - embossed using a Spellbinders 3D embossing folder called 5X7 European Tapestry.  To get the colors to coordinate the way I wanted them to, I had to use 3 different colors of ink to hit the embossed areas - two purples & a silver - but in the end, I really liked the way it turned out.  A strip of purple opal card stock forms a border that the butterfly focal sits on - along with the tag.

Inside:

Another piece of purple forms the border - with another tag & butterfly from the kit finishing things off.  The sentiment was stamped using a stamp from For All You Do Vintage Labels Three from JustRite.

Card #2:

In this kit I had a variety card stock scraps & misc pieces (label from HOTP, die cut "thanks", vellum "thank you", journaling card "My Perfect Day").  For the card front, I started with a piece of green card stock that I embossed (Spellbeinders 3D Celtic Weave) inked with Pine Needles distress ink.  This forms the background.  A blue card stock strips forms a border that holds the label (green Jewel Dazzles cover pink that doesn't go with the card's colors) and "thanks" die cut.

Inside:

A couple more bits of card stock with the other elements of the "kit" finish off the inside.

Card #3: Kit I made using bits of card stock and paper that coordinate with the pre-made focal (HOTP Janie's Girls colored with Inktense & watercolor pencils) and a sentiment leftover from a scrapbook kit.

This center step card has blue paper & green card stock forming the borders & background of focal area.  A die cut "thanks" (Script Greetings from HOTP) matted on white card stock enhances the fun focal.

Inside:

After adding a border with the blue & green and the scrapbook sentiment, I stamped the center sentiment using a HOTP stamp from Thank You! stamp set.

Sunday, December 27, 2020

Gift Wrap Cards

Today I have three cards made from a reversible wrapping paper that I received on one of my Christmas presents.  

Card #1 (above): The focal was cut from white card stock using a Luscious Labels One die (Spellbinders) - stenciled with Faded Blue Jeans distress ink & stamped with the same ink and a Thank You stamp from Inkadinkadoo.  I used a flag die from the 5X7 Card & Box Set by Card Making Magic - stenciled with the same distress ink.

Inside:

Inside is another piece of the wrapping paper & a stenciled die cut (Decorative Labels One - Spellbinders).

Card #2:

Believe it or not, this card was made from the same wrapping paper as the first one.  It was a reversible wrapping paper with this foil paper on the reverse of the blue & white snowflakes.  I cut the word "Peace" from the same paper, matted it on pink, and then on a black snowflake (Three Snowflakes - HOTP) that was matted on green.  I also added a couple small pink snowflakes - one layered with a small black one.

Card #3:

The third card once again uses the snowflake pattern wrapping paper.  The focal & mat use stenciled die cut pieces (cut with 5X7 Renaissance Jubilee Ravenna) - stamped with stamp from Thanks for Everything Divinity Designs stamp/die duo set.

Inside:

In addition to the piece of wrapping paper, I used a stenciled die cut (Journey Rectangle set from Fun Stampers Journey) stamped with a stamp from HOTP's Thank You! stamp set.

Sunday, December 20, 2020

Pretty in Pink

A pretty pink birthday card is what I have today - made using a Debbi Moore download called Cottage Retreat.  I made it a couple of weeks ago and just found that I hadn't photographed and posted it.  The "mat" for the focal is a faux one that was printed with the focal.  But since there are several layers on top that have been added with foam tape (paper tole style) that is not immediately obvious.  I wanted the background on the card to be a pink that coordinated, but I didn't find paper in my stash, so blended two colors of distress ink - Worn Lipstick and Picked Raspberry.  The greeting also came with a printed mat, but I didn't care for the color, so traced the outline on a piece of pink card stock from my stash & fussy cut it - then cut off the original mat before gluing the sentiment down.

Inside:

A couple of borders using that same pink card stock from the stash formed a great backdrop for more pieces from the Debbi Moore kit.

Friday, December 18, 2020

Another Window Card

Today's card is one I started a long time ago.  I set it aside and made another because I had intended for the girl to be looking IN rather than OUT the window!  (Here's the one I actually finished at that time.)  

As with that one, the "window" was cut using dies from Gemini's Window Arches; the word Friend was from their Peek-a-Boo Dog set. The little girl is stamped and heat embossed (black powder) with Child at Fence Fronts-N-Backs by Art Impressions.  The "brick" was created using Raspberry Sorbet Lustre Polish (Cosmic Shimmer) and a stencil called Mini Bricks from TCW.  most of the rest of the color was added with Inktense pencils - but "flesh" tones were from watercolor pencils.

Inside:

Once again I stamped & heat embossed with black powder - stamps used were the Child at Fence (see above) and a Paper Discovery stamp set called "Timeless".  Once again I mostly colored with Inktense pencils & a water brush, but I used gelatos & a water brush for the falls, molding/door, and child's boots.

Thursday, December 17, 2020

Pink Thank You

Today's card was made using a pre-made focal I made some time ago using stamps from Greetings and Labels and matching cutting die from 6 Layered Labels and 2 Swirls (HOTP) and Personal Impressions Thank You (Inkadinkadoo).  I matted this on a patterned paper die cut with Labels Twenty-Nine die (Spellbinders).  The background was embossed using a folder called Rosa (Anna Griffin Cuttlebug).  To this I added distress ink (Worn Lipstick & Picked Raspberry) using a round foam applicator.

Inside:

Inside I used a scrap of the pink as a foundation for my sentiment.  I added a die cut "You" from my stash (You Bless Me So stamps/die set from Divinity Designs).  I added a stamped & embossed "made my day" from You Greetings (HOTP).  I colored some of the background with the same distress ink from the front, added the finished pink piece, and a scrap of doily from my stash.

Wednesday, December 16, 2020

Quick Thanks

Here's a really quick thank you card created with scraps from my stash & a die cut sentiment (HOTP Script Greetings).  

Inside:

Tuesday, December 15, 2020

Floral Fantasy Sympathy

Here's another sympathy card made with the materials in the Floral Fantasy Artful Card Kit (ACK - HOTP).  This brings my running total to 3 cards made from this ACK.  

The only additional supplies I've used for this card are: a white card blank, black paper, and blue-green glimmer paper.  I used a stamp from the Stamp and Punch set from HOTP, a template from HOTP's Design Toolkit #7, and two different sizes of paper punches (to create embellishments at the bottom of the card).

Inside:

Inside I've just added more pieces from the ACK.

Monday, December 14, 2020

Sympathy in Blue

Unfortunately there's a bit of glare on the picture of this card.  It's a pretty straight forward card, made using 3 mini Hunkydory die cuts.  I used dies from the Journey Rectangles die set from Fun Stampers Journeys.  The papers are from HOTP and the little hearts are punched from the dark blue glimmer paper.  The silver is metallic poster board.

Inside:

Inside is more of the same.  Stamp is from JustRite's Sympathy Vintage Labels.

Sunday, December 13, 2020

Floral Fantasy Condolences


Today's card is a sympathy card done in the "double cutaway easel" style. The card base was created by attaching a 2 1/2" wide strip of black card stock to the back of the center top of a 5" x 7" piece of the same. A black card stock mat backs the printed paper mat behind the focal. Most of the materials are from the Floral Fantasy Artful Card Kit (2nd card I've made from that kit). The focal is from the Floral Fantasy Foiled Papier Tole. Both from HOTP.

The picture above shows the completed card standing as an easel card. Next we have it closed:

And this is what the inside looks like:

Wednesday, December 9, 2020

Computer Guy Birthday Card

Today's birthday card is for my brother who works with computers.  It's from a download kit I got - one of the weekly giveaways from Crafty Bob's Giveaway.  Though you can't tell from the photo, the card front has several layers separated by foam squares, creating a lot of dimension.  However, I DID save one of the layers to use on the inside:

Everything came with the kit except the background paper on the inside of the card.  I found a piece of light blue paper in my stash & then  drew a frame around the edge using a dark blue Sharpie pen. 

Friday, December 4, 2020

More Sunshine & Smiles

Today I have some more cards made from the Sunshine and Smiles Artful Card Kit (ACK).  This brings the total from this kit to more than 10 so far (I know there were other's I made, but so far I have 10 that I photographed & KNOW came from this ACK).

Card #1 (above):  This first card is a sympathy card.  Most elements are from the ACK, but I added the flowers from my stash (coloring one with Distress Ink) and ribbon from my stash.  The sentiment came from a HOTP set called Stamp & Punch.

Inside:

Inside is more from the ACK - stamped with stamps from Divinity Designs stamp and die set called With Sympathy.

Card #2:

Next up is a thank you card.  In addition to elements from the ACK, I used ribbon from my stash and die cut elements (dies from Spellbinder's Fleur De Lis Doily Motifs and 2012 Holiday Tree - the latter have been cut to modify the shapes).

Inside:

Inside is more of the same - with a stamp from Divinity Designs stamp & die set called Thanks for Everything.

Card #3:

Card #3 adds a piece of glitter sheet from JeJe & some black paper & white paper from my stash.  The white mat was die cut with a die from Spellbinder's Decorative Labels One.

Inside:

Inside is more of the same.  Two different dies were used - both from Spellbinders: Fancy Ribbon Threader and Decorative Labels Eight.

Card #4:

Next up is a card to which I've added silver metallic poster board.  The die cut mat is from Spellbinder's Heirloom Legacy die set.

Inside:

Inside I've added silver mats cut with Spellbinder's Decorative Labels One and a white one cut with the 2012 Holiday Tree.  However, all of these die cuts have been sliced to create the shape I actually wanted.

Card #5:

I've added black and white paper from my stash, and a piece of black glitter ribbon. Die cuts are from Spellbinders Decorative Labels One, and I've used the JeJe glitter sheet on the center of the focal.  Sentiment is from the HOTP Stamp & Punch stamp set.

Inside:

The stamp used on the inside was also from HOTP's Stamp & Punch set (heat embossed with clear powder).

Thursday, November 19, 2020

HD Christmas Past - A Gift for You

These cards finished off the HD Christmas Past card kit - from the set called "A Gift for You".  There are 7 cards from this set bringing the total from this kit to 45 cards!

Card #1 (above):  The background on this card was cut from a piece of AS (adorable scoreable card stock) from the set (I cut out the center with a Spellbinders Romantic Rectangles Two and used part of that on the inside of the card).  The focal is from a Debbi Moore freebie - and the sentiment from another.  I cut pieces from a gold die cut for top and bottom of the focal (Spellbinders Fleur De Lis Squares).

Inside:

Inside is another Debbi Moore focal & Greeting.  The red top & bottom was cut from the background on the front of the card.

Card #2:

Once again, this card started with a piece of AS from the set.  To this, I added pieces from a Debbi Moore set and a piece of red ribbon from my stash.

Inside:

Inside is more of the same.

Card #3:

Once again, card number 3 consists of background of AS from the set and focal/sentiment from a Debbi Moore set.

Inside:

More from the same.

Card #4:

Card number 4 is a large card - 5 1/2" x 8 1/2", embossed with Decor Circles by Theresa Collins and inked with a couple of colors to get the shade I wanted.  The rest of the elements are die cuts from the set.

Inside:

The inside has border and die cut from the set.  The rest are pieces of Hunkydory AS but not from this set.

Card #5:

This card started with a piece of AS from the set.  To that I added a gold frame cut with Spellbinder's Resplendent Rectangles and a couple of pieces from Debbi Moore.

Inside:

Inside is more of the same - with leftover die cut pieces from card #1

Card #6:

Once again I started with AS from the set for the background.  I added some pieces cut from a doily and border/greeting/focal from Debbi Moore.

Inside:

More AS & another Debbi Moore piece complete the inside.

Card #7:

This last card uses pieces of AS that may have been leftovers from another HD set (not sure) - matted on gold poster board.  The focal is from this set, but the frame was from another one - it was actually a hot pink color which I colored over with a red Sharpie pen.  The braid border is from my stash.

Inside:

Inside are more pieces of AS, a tag from the set, and more braid from my stash.

It feels like quite an accomplishment to complete this HD kit - and to have gotten 45 cards from it!