Please let me hear from you!

This blog is for sharing a love of paper crafting. You can also check out my Pintrest pages. If you find the ideas here to be helpful, I'd love to hear from you. It is what helps make the time I put into this blog feel worthwhile, and always brightens my day. I love hearing your ideas too!

(To leave a comment, scroll to the bottom of the post. You will see how many comments there are for that particular post. Click on the number of comments and the comment window will open. Also, if you want to add a link to something, follow the instructions at the bottom of this post.)

NOTE: If you click a link from the menu (below left) and are told the page does not exist, chances are good that it's a prepared post that will post at some point in the future, so be sure to check back!

You can also click this Pinterest Button to pin pictures in the blog posts.


Saturday, November 30, 2013

Thank You - Continues!

The Thanksgiving holiday is behind us, but I hope not the thought behind it.  I choose to carry that spirit of Thanksgiving with me into the Christmas holidays and the coming year.  I'll finish out the Thanksgiving theme with today's thank you cards - which of course could be used at any time of the year!  Once again, they feature focals from the Antique Autumn Tags One stamp set and matching dies from JustRite.

I really like the way this first card came together.  It was quite unexpected!  Here's how I did it:
  • Brown patterned paper from DCWV matstack with element cut out (5X7 Enchanted Labels 28 from Spellbinders) and saved for later
  • Green patterned paper from HOTP
  • "Saved" brown element
  • Peach card stock cut/embossed with die from Spellbinders' Decorative Labels Twenty-Seven, and a green piece cut from a smaller die from the same set
  • I just had to try threading some ribbon through the holes in that small green element, and you see the result.
  • The stamped image is colored with glittery gel pens.

This one is not a favorite, though it took some time to complete!  The pink layers - both glitter card stock and vellum - were cut with dies from the Holly Motifs and Accents set from Spellbinders. The white is from Spellbinder's Labels One die set. I cut a lot of the pink pieces apart, and and I also used a lot of the "innies" arranging them as you see here around the focal (colored with gel pens), and the corners of the card.  I like the focal, but am less happy with the corner treatments.  At any rate, it was an interesting experiment.  I finished the card off with some Liquid Pearls.

The focal for this last card was colored with chalks and gel pens and accented with liquid pearls.  It is layered onto a couple of pieces (purple paper and brown glitter cardstock) that were cut with dies from the Ornate Squares set from Spellbinders.  The remaining two pieces were cut using their 5X7 Enchanted Labels 28 set. I used a brownish Liquid Pearls to accent those pieces.  I may add a ribbon bow - it looks like it could use a "little something" else.

Friday, November 29, 2013

Don't Forget the Insides!


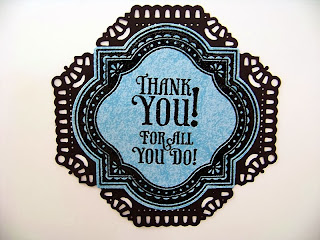
Today I thought I'd showcase a few of the "insides" from some of  those "Thanksgiving Cards" that I've shown recently.  The truth is that often I don't do much on the insides of my cards - maybe a bit of a border with papers from the front.  Seldom do I do much more than that.  But with the stamps from JustRite and Spellbinder's dies, I can quickly and easily make the insides look as nice as the outsides!  All the focals in this post were made with the help of "For All You Do Vintage Labels Three" from JustRite (and their matching Vintage Labels Three dies) - for both the frames and the sentiments.  

For this first card, I stamped with Versamark ink onto my blue paper and then heat embossed it with fine black embossing powder. I cut it out and then used a die from Spellbinder's Decorative Labels Twenty-Seven to cut the black mat on which it sits.  Very quick, but quite elegant.


This one was created in two layers.  The top layer was stamped with VersaMark ink onto turquoise paper, then heat embossed with fine black powder before cutting with the matching die (just as the previous one was).  The mat layer was stamped with turquoise ink onto white cardstock, then heat embossed with clear embossing powder.

This one was stamped in brown ink directly onto the inside of the card - then heat embossed with clear embossing powder.


This time I used gold embossing powder on brown glimmer paper.  After cutting and embossing it with my Spellbinder's Scalloped Rectangle die, I took an embossing pen, ran it around the edge, and embossed that with the gold powder too.  The mat was cut from a glittered card stock using a Fleur de Lis Rectangles die from Spellbinders.


The inside of this last card may look better than the outside!  The frame was stamped with purple ink and embossed with clear powder.  Then the sentiment was stamped with VersaMark and embossed with fine black powder. After cutting it out with the matching die, this piece was mounted on a black piece that was cut and embossed using a die from Spellbinder's Gold Labels Four.  The bottom layer is cut from a purple glimmer paper using a die from the 5X7 Enchanted Labels 28 set.

That's it! Quick and easy "insides" for my cards.

Thursday, November 28, 2013

With Gratitude on Thanksgiving Day

Again today I have a couple of Thanksgiving/Thank you cards.  Once again they showcase the JustRite stamps and dies - though the sentiment inside the frames comes from a different stamp set (HOTP Tiny Words and Images).  The layers for this first card were created as follows:
  • Gold background with gold element cut out of center and set aside (5X7 Enchanted Labels 28)
  • Blue paper "Shine Design" from HOTP.
  • Gold element saved from first layer
  • Blue glimmer paper cut with die from Ornate Squares - small piece cut from center of it, using small die from Marvelous Squares, and set aside.
  • Yellow piece cut/embossed with Gold Labels Four die
  • Small blue piece that had been set aside.
  • Stamped tag colored with chalks and added with foam tape.

This one's layers are as follows:
  • Green glitter card stock cut with largest 5X7 Elegant Labels Four die. (Labels Four die used to cut out center to save for another project).
  • Gold vellum cut with the medium-sized die from the same die set.  Because it's translucent, you can see through to the base card where the green was cut and saved for later - adds an interesting dimension.
The rest of the layers are really scraps from other projects:  
  • A square piece cut from the green patterned paper using a Marvelous Squares die
  • A gold piece leftover from cutting corner pieces with a Marvelous Squares die
  • Black "innies" cut apart and attached behind the tag
The tag itself is colored with chalks and gel pens with a touch of silver Liquid Pearls.

Wednesday, November 27, 2013

Heartfelt Thanks - You are a Blessing


Today I've got a couple more Thank You/Thanksgiving cards.  Both once again showcase stamps from the JustRite stamp set called "Antique Autumn Tags One" and the matching dies.

Fir this first card, I used a sentiment from another set in the frame from this set.  I colored it with red chalk, silver gel pen, and red Stickles for the "jewel".  This is once again mounted in layers cut with Spellbinder's dies.  

  • The back layer is a plain piece of red.  I cut/embossed a couple of small squares from the Fair Isle Pendant die set before gluing it down, so I could have them for later. 
  • The black mat is cut with a die from the Resplendent Rectangles set.  Once again, I cut a black square from the Fair Isle Pendant set which I saved for later.
  • Next came a silver glimmer paper cut and embossed with a MaryAnn cut/emboss folder.  I trimmed away part of the design so it would fit within the black mat. 
  • I attached the "saved" pendant pieces to my sentiment (cutting the black one apart so the ends would show a bit more from behind the sentiment), then mounted the whole thing to the rest with foam tape.


For this card (once again stamped with stamps from that JustRite set & cut with the matching die) I chose to color the tag with yellow and pink chalks.  The background paper is a glittered cardstock from a DCWV matstack.  The gold is glimmer paper; the pink is foil paper; the brown is glittered cardstock.  I used the following Spellbinders dies (in addition to the JustRite one):

  • Marvelous Squares die for the gold corner pieces
  • 5X7 Enchanged Labels 28 (cut in half and separated slightly) for the bottom layer of matting
  • Resplendent Rectangles die for the pink foil
  • Ornate Squares for the brown glittered cardstock piece
  • Gold Labels Four for the next gold layer up.
  • Decorateive Labels Eight for the tiny pink foil piece just peeking out behind the tag focal.

Tuesday, November 26, 2013

Celebrate Your Blessings!

Here are a couple more Thanksgiving Cards.  You will notice that this year I decided to expand my color choices, rather than doing everything in the traditional fall colors.  These focals once again feature stamps from JustRite's Antique Autumn Tags One stamp set and were cut with the matching dies.  For both of these cards, I stamped the tag in brown and then colored them in with chalks. 

The background paper for this first card was from an 8X8 set of papers, but I don't remember the manufacturer.  The brown frame started as a rectangle of brown glitter card stock.  I used the largest die from the Radiant Rectangles set to cut out the inside.  I also used dies from this set to create the cream-colored oval which holds the stamped greeting.  I used my scissors to snip around more of the die-cut elements so I could slip the tag through each end (you can get an idea of how the tag looked to begin with when you look at the next card.  The pink vellum piece was cut with a die from the Resplendent Rectangles set - as was the white mat that sits behind it.

This card showcases background paper from a 4.5 x 6.5 DCWV matstack.  The pink/purple is a mylar-type wrapping paper (it's not the easiest to cut with dies, but persistence works wonders)!  In addition to the JustRite die, the dies used here were (all Spellbinders):
  • Marvelous Squares die for the corner pieces (cut apart)
  • Radiant Rectangles for the bottom cream mat layer
  • 5X7 Enchanted Labels 28 for the Pink/Purple mat layer
  • Tag from Ornate Squares for cream top pieces ("innies" glued at each end of the greeting, and the tag cut apart with ends glued top and bottom behind the greeting.  

Monday, November 25, 2013

Time to Give Thanks - Again!

Today I am back to Thanksgiving cards featuring a stamp that I showcased last week.  For this first card, I colored the stamped image with chalks and my AquaPainter pen.  In addition to that JustRite stamp (Antique Autumn Tags One) and die (Antique Tags One), this first card showcases Spellbinder's 5X7 Elegant Labels Four die set.  The largest die cut the green background.  As is my usual practice, I used a die from the standard Labels Four set to cut out a shape from the middle that would be hidden by the purple mat. I did the same with the purple mat, expecting to use the cut-out piece from the green to make another layer before adding the brown piece (brown glitter card stock also cut with the 5X7 Elegant Labels Four set).  As I started to assemble the card, though I realized I rather liked having the cream colored card base peek through, so I didn't add the green cut-out.  As you can see, I threaded a ribbon through the die cut pieces to finish off the card.


This card is a bit different!  The corner treatments are from a Marvelous Squares die (Spellbinders).  I used a couple more on the ends of the copper mat (which was cut with a die from Resplendent Rectangles).  Then I cut two more pieces from the brown - this time using a Decorative Labels Twenty-Seven die. Then I cut each in four pieces and arrange the resulting pieces behind the copper mat. I cut the green backing for my chalk-colored stamped image out of green glitter card stock using a die from Fancy Tags Two die set.  Before gluing everything in place, I went looking for a die to use to cut out the hidden part of the copper mat (can't waste any of that beautiful paper afterall!).  The "buckle" from the Radiant Rectangles die set was just the thing and I just HAD to thread some green ribbon through that lovely buckle to finish off this card.  Oh yes, the decorative background paper is from a DCWV 4.5 x 6.5 matstack.

Sunday, November 24, 2013

Wishing You Were Here


Yes, this card DOES use JustRite Stamps, but just for the words this time. I do like the small words I can use to add to the main sentiment.  They are both from the Grand Sentiments stamp set. They are cut out with Resplendent Rectangles dies from Spellbinders.  (Love those!)  

It's hard to get a good picture that shows the bottom detail of the card, but the border at the bottom adds so much!  I cut and embossed the edge with some of Spellbinder's Edgeability dies and the embossed a blue strip with the same and glued it to the inside where it would show through.  Here are a couple more pictures:


Saturday, November 23, 2013

I'm So Thankful for You

Today's Thanksgiving cards showcase another Stamp Set from JustRite.  This one is called "Autumn Vintage Labels Three". I LOVE the acorn frame!  And the sentiment is perfect for Thanksgiving cards!  

This first card came together pretty quickly.  
  • The background is a brown glitter cardstock cut with the largest die from Spellbinder's 5X7 Elegant Labels Four. I think I snipped out a bit at the sides with scissors to give this look.
  • Then there is the mat for my sentiment. It was made in two layers.  I first cut the black piece with a die from Spellbinder's Ornate Squares.  Then using the same die as a template I traced around it on the blue-green paper and cut that out with scissors.
  • The sentiment was colored with gel pens, using my Dove Blender pen.  I like the look I get by doing that.  For instance, on the leaves, I drew in green on the veins, then used the blender to pull the color out to the rest of the leaf, giving a two-toned effect.  Similarly with the acorns, I drew on the cap, then used the blender pen to draw the color out over the rest of the acorn.  I pinked the edge of this piece and attached it with foam tape. 


The second card today uses the same sentiment, but I get a totally different look by using a different frame.  This one is from a Hot Off the Press stamp set called "Stamp and Punch".  I stamped it in black ink, and then used purple chalk and a water pen (AquaPainter from StampinUp) to color the edges. I few dots of purple Stickles sets it off nicely.  I matted it with a plain square mat and then layered that on top of the tag piece cut from Spellbinders Ornate Squares die set. I added a bit of purple Stickles here too, giving the look of jewels. The whole thing was attached with foam tape.

The background is done in three layers.  Plain black, topped with embossed white (M-Bossabilities folder), and then a purple piece. The white and purple are both glimmer paper, so this looks quite pretty in person.  The purple piece was created using one of MaryAnn's "Cut and Emboss" folders.  I love that it cuts and embosses all at the same time!  I enhanced the background a bit using dots of black Enamel Accents.

That's it for today!  Hope you've enjoyed seeing these as much as I've enjoyed making them!

Friday, November 22, 2013

Start Each Day with a Grateful Heart

Today I've got two more Thanksgiving Cards.  For each of them, the frames for the sentiments come from the JustRite stamp set (Antique Autumn Tags One) and matching die set that I've been using all week.  The sentiment itself, this time came from another of their sets called "Vintage Rose Medallions".  I love the sentiment.  It is such a good reminder to me! 

This first card is a favorite and was so quick and easy to make!  I started with a printed 4.5" X 6.5" piece from a DCWV Matstack called Harvest Gathering. It is such a beautiful piece it doesn't need much else!  I cut and embossed a mat for my sentiment from a beautiful copper foil paper using a Spellbinders Decorative Labels Eight die. The ribbon was one I scavenged from a small gift or card I received.  It looks like it was just made for it!  That's it!  Quick and easy, but I love it!

I'll admit that this one isn't one of my favorites.  I wanted to use the background paper (another from the DCWV matstack) and had a really hard time figuring out how I wanted to use it.  But it looks nice in person.  The tree trunks and bottom later of the stacked sentiment are all a lovely copper metallic. 

The layered sentiment was made this way:
  • Bottom layer: Copper foil paper cut and embossed with a die from Spellbinders Resplendent Rectangles set.  
  • The next layer (rust color) is actually four die cut pieces tucked behind the yellow.  I cut two tags from Spellbinder's Ornate Squares die set, and cut each in half giving me the bits you see at each of the four corners.
  • Next is the yellow layer which was cut and embossed with a die from Spellbinders Gold Labels Four.
  • The sentiment is tucked into another of the tag die cuts from Ornate Squares die set.  I took a couple of the "innies" from that die cut and glued them top and bottom.
  • The sentiment itself is colored with two different colors of chalk blended together.

Thursday, November 21, 2013

Heartfelt Thanks

I'm not sure what happens with the camera sometimes - still learning about taking pictures of  my cards.  In this case, the color of the card at the top is what it is at the bottom, too (purples instead of black & grey!), but you get the idea anyway.  I suspect the issue is that they are both glimmery papers, so the light catches them differently at the top than at the bottom. 

Today I have two more of my "Thanksgiving Cards", though they could just as easily serve as Thank You cards at any time of the year.  They both started with the same "Antique Autumn Tags One" stamp set from JustRite (and matching die set) that I've been showcasing this week.  I love this frame.  As you can see, the two focals look quite different, even though I used exactly the same stamps and both even have turquoise as a major color in them.  The inner sentiment this time, was not from that set.  It was from another of their sets called "Fancy Tags".

The large light purple mat at the base of this first card is a beautiful shimmery purple/lavender paper that I scavenged from a used store-bought card. The turquoise is paper from Hot Off the Press, while the purple and white are glimmer papers from my stash.  One of the techniques I used with this card was to cut my die cuts apart to create the look I wanted.  This is what I did:
  • Starting with the corner treatments on the turquoise layer, those were cut with a Spellbinder's die from their Adorning Squares set.  The die cuts out a square from which I cut the corners to "adorn" the corners of the turquoise layer.  
  • The next layer up started with a piece of the white paper that was embossed with an M-Bossability folder, then covered with a pretty French Lattice die cut (Cheery Lynn die) from which I trimmed the edges (putting the long edges under the long edges of the white for a bit of an illusion of a mat). 
  • Next layer up is purple.  I cut one of the larger pieces from the Spellbinder's Labels Twenty-Seven die set and then cut that in half and arranged each half at either end of my white and purple piece that forms the next layer up.
  • The next layer is a white piece cut with TWO dies from the Resplendent Rectangles die set (Spellbinders) which forms a frame for the purple piece that was cut from a die from their Fancy Ribbon Threader die set. I cut a couple strips of the turquoise paper to weave through this purple piece in place of ribbon.
  • This all laid the foundation for showcasing my framed sentiment.  After stamping it, I colored it with gel pens and added a "jewel" with some purple Stickles.  The sentiment is attached with foam tape for added dimension.

Next up is a second card using the same stamped focal, but colored differently. 
  • Focal: This time it was colored with turquoise chalk and then the silver design was colored with gel pen.  The "jewel" this time was done with liquid pearls.  This framed sentiment was attached to a piece of black glittered cardstock that was cut with a die from Spellbinder's Ornate Squares.  The ends of the tag focal are tucked into the openings in the black glitter die cut, and then the whole thing is attached with foam tape.
  • Plain turquoise layer is cut with a die from Spellbinder's Resplendent Rectangles.  I used the same die as a template, tracing around it and cutting out the black mat that showcases this piece so well.
  • The next layer down is one of those made with the Embossed Waxed Paper Resist Technique shown here.
  • This is matted with a piece of black that was embossed in an M-Bossabilities folder.
As Thanksgiving draws near, one of the things I'm thankful for this morning is the chance to do some paper crafting again!  It's been way too long and I've missed it!

Wednesday, November 20, 2013

You Are . . .


Today's cards once again make use of the Just Rite "Antique Autumn Tags One" stamps and matching "Antique Tags One" die set.  I've used the same stamped frame for both, but stamped different sentiments inside them.  That is one of the things I love about these stamps - the frames can be used to frame a variety of sentiments.  These particular sentiments are a part of the set, but I can, and do, use other sentiment stamps with them.

This blue card starts with a piece of striped paper that I've had in my stash for some time.  I don't remember who made it.  I inked the edges and adhered it to my card base.  The next layer up is a piece of white glimmer paper that was embossed in an embossing folder.  I love the texture that adds!  Next layer up is a piece of dark blue glimmer paper cut and embossed with a die from Spellbinder's Resplendent Rectangles. The lighter blue is cut and embossed with a die from their Radiant Rectangles set.  The focal tag itself is framed by another dark blue piece cut and embossed with a die from their Ornate Squares set. The tag itself was stamped in black ink and then shaded around the edges with with blue chalk and popped up on foam tape.


This card brings an unusual color pairing of brown and purple.  It is brought together in the background paper that comes from another 6.5" x 4.5" matstack from DCWV called "Indian Summer".  For the focal, starting with the bottom layer, we have a white layer cut with a die from Spellbinder's Fleur De Lis Squares, then a brown glitter cardstock piece cut and embossed with a die from their Ornate Squares.  The next layer is a purple glimmer paper cut and embossed with a die from their Decorative Labels Eight set.  The stamped label itself is stamped in brown ink and shaded around the edges with purple chalk.  It is then inset into a white piece that was cut and embossed with a die from Spellbinder's Ornate Squares die set before being added with foam tape for dimension.

Tuesday, November 19, 2013

Thinking of You JustRite


As you've probably noticed with the last several posts, I've fallen in love with JustRite stamps that can be cut out with matching die sets.  Today I've got three examples to show you of cards made with a stamp from their Vintage Rose Medallions set.  The sentiment inside was from some other set I had in my stash.  To make this first card, I stamped the frame & sentiment in embossing ink on a white glimmer paper and then heat embossed it with fine black embossing powder.  After it cooled, I cut it out with the matching JustRite Medallion die. I cut and embossed a black mat using one of the Oval Medallion dies, and used a white gel pen to draw around the embossed line. 

The "Ribbon" is a strip of black paper that has been embossed with one of the inserts for the Spellbinders Edgeabilities dies.  A black and white striped paper matted on plain black gives the background for this card.  I want a white ribbon to finish it off, but don't know if I'll get one before this goes in the mail to someone.


This focal uses the same stamps as those in the first card, but I used white embossing powder and then went over all of it with some distress ink to create the look you see here before cutting it out with the matching JustRite die.  A ribbon runs across the background.  That floral turquoise paper is from my stash - not sure who made it.  The frame was cut and embossed using Spellbinder's Resplendent Rectangles dies, and the  white diamond mat for the sentiment was cut and embossed with their Marvelous Squares dies.

This last card has a focal made with the same stamp, but a different sentiment stamp - all stamped on red card and embossed with white embossing powder.  This time I took a square of white paper, cut out the center with the matching die, and turned it to form a diamond-shaped frame.  The frame this time is popped up off the red sentiment square using foam tape.  All is then matted on a piece of embossed white.  I think the roses paper is from HOTP, though I can't be sure.

Time to Give Thanks


As promised, here are some more cards using stamps from the JustRite set called "Antique Autumn Tags One" that are designed to be cut out with their "Antique Tags One" dies. As before, they serve as a part of a focal that was created by layering cuts from other die sets. 

Though it looks elaborate, this first card was really quick and easy because everything except the layered stamped focal was already printed on the scrapbook paper I chose for the background.  It is called "Grateful Multi-Stripe" made by KI Memories.  You can't really tell it in the picture, but the oval mat piece is a copper metallic paper that is really glimmers and shines when you see it in person.  The die used to cut it is a part of Spellbinders Resplendent Rectangles set.  The gold piece on top of that was cut and embossed  using a die from their Gold Labels Four set.  The tag focal was stamped in brown ink and colored with metallic chalks.


This card again uses papers from the DCWV "Harvest Gathering" 4.5 x 6.5 Matstack.  The background is a piece that has been inked around the edges.  The focal is once again layered die cuts using Spellbinder's dies.  The largest one (brown) is from the 5X7 Elegant Labels Four set, and the yellow and rust-colored ones are all cut with dies from their Gold Labels Four set. The focal was stamped in brown ink and colored with chalks. 

Monday, November 18, 2013

Gratitude


As Thanksgiving draws near, I once again find myself wanting to stop and take time to acknowledge the special people in my life.  So, as is my custom, I've been making Thanksgiving Cards.  This year I've purchased some special stamps from JustRite that are designed to be used with cutting dies.  This is really speeding up my card-making process since I can use dies to cut out my focal pieces.  Today's post showcases 3 different cards made using the same two stamps - both from the JustRite set called "Antique Autumn Tags One" and cut out with a die from JustRite's "Antique Tags One" die set.  Over the next several days, I'll be showcasing several more cards made using other stamps in that set.  The patterned papers I'm using come from a DCWV 4.5 x 6.5 Matstack called "Harvest Gathering".  I love this size of matstack for card making! The plain colored papers were glimmer paper from my stash. These cards were all made quick and easy by layering die cuts.  And in each case, the focal is given a bit of dimension with foam tape.

The first card (teal one above) was made using the following additional dies: Spellbinders 5X7 Elegant Labels Four (cut the dark teal background), Spellbinders Adorning Squares (one of the larger dies for the black mat, and a medium one for the white mat). The white "ribbon" under the narrow black one is really just a narrow strip of the same paper used for the white mat for my focal.  The focal itself was stamped with black ink and then colored with gel pens.  The center of each flower is a Liquid Pearls dot. The background teal piece was altered a bit by snipping out little pieces with my scissors after cutting it with the Elegant Labels Four die.


These next two cards are done in more traditional Thanksgiving colors. The patterned papers are from the matstack.  For the striped card, I used the following additional dies:  Spellbinders Labels 27 (orange dot) and Decorative Labels 27 (white frame for rust-colored dot, and yellow flowered pattern); Spellbinders Ornate Squares (brown frame).  The focal was stamped in brown ink, and then colored with chalk before adding additional touches with gel pen and gold liquid pearls.


The color on this one isn't true.  The brown is not nearly as black looking as the picture - more like the brown in the previous picture.  Once again in addition to the nested medallion die I used Spellbinders Ornate Squares (brown lacy layer) and Spellbinders Decorative Labels 27 (rust-colored dot and yellow dot pieces).  The focal was again stamped in brown ink and colored with chalk before being accented - this time with a glitter-gel pen.