MENU

Sunday, March 31, 2013

Birthday Cheer


Yes!  This card is also using paper from the paper swap - but this time I don't think the paper was from HOTP.  No idea who made it. It's one of the first red and green papers I've seen that didn't immediately scream "Christmas" at me. I liked the little jagged edge at the bottom -- the paper came that way.  But I decided to dress it up a bit with this bit of lace with 1/4" white ribbon & 1/8" red ribbon woven through it.

The focal just sort of evolved.  I tried stamping my sentiment on the paper itself - but the background was too busy for the stamping to show up well.  So, I found a white die cut piece in my stash (cut with a Spellbinder's die) and stamped on that.  I threaded a strip of white paper along with 1/8" red ribbon through the sides of the die cut.  I used a corner punch on the white mat before inserting the patterned paper into it and arranging my focal on top.  This whole matted piece is put on foam tape for added dimension.

Saturday, March 30, 2013

In the Pink


This birthday card started with this flowered patterned paper that I got in a swap.  I think it's from HOTP, but not certain.  The pink also came from the swap.  I used a technique I often use and die cut the elements (Spellbinders dies) used for focal & matting from the part of the larger pink mat that would be covered by the patterned paper.

The sentiment is stamped and embossed with fine white embossing powder. The border is made with a snippet of lace that I threaded a pink ribbon through and attached before gluing the patterned paper to the card.

Friday, March 29, 2013

Black and White and Red All Over!

Another paper swap card, this one starts with a sentiment stamped on a black die cut (Spellbinder's die).  I first stamped it with an opaque white, then with red, then embossed it with clear embossing powder.  This is matted on red and then on black.  Both were cut with a Spellbinder's die (Resplendent Rectangles).  The red was short for the full die, but I chose to use it anyway.  It puts a pierced edge around the die cut, so on the upper and lower edges (that were too short to be cut by the die) I did my own piercing.  As you can see, before gluing the background paper to the card, I slipped a couple of ribbons through holes on the edge of the black die cut mat and wrapped them around to the back.  Layered flowers complete the card (with Jewel Dazzles centers).

Thursday, March 28, 2013

Green & Yellow Flowers

This card is one I'll be sending to a friend who recently lost her husband.  Today is his birthday and I know she'll be missing him especially today.

The focal was stamped in green using a set of stamps I got with my Cardmaking and Papercraft magazine.  LOVE getting these stamp sets with the magazine!!!!  This one is a single stock of flowers, but I stamped it multiple times - sometimes with just the tips of it showing.  Then I colored the flowers in with Smooch Ink and added a little extra color to some of the stems with a gel pen.  The fancy mat is a Spellbinder's die, and another Spellbinder's die made the little pierced strip that I matted for a border at the bottom.

Wednesday, March 27, 2013

Silver & Blue


Sorry about the blurry image!  This card was a challenge.  I stamped and embossed (silver embossing powder) the focal on some shiny blue paper that came from a swap (HOTP paper).  Then I had a REAL challenge finding paper to go with it!  I finally settled for a blue/silver/white theme using this lovely blue and silver piece from my stash for the background.  The silver papers are glimmer papers.  The white ribbon with silver trim was some I got on sale at Christmas time.  I love it on top of the border of the darker blue.

Tuesday, March 26, 2013

Paper Frame


As with most cards I've been making lately, this one starts with paper from a paper swap.  It is paper from HOTP.  

The brown frame is die cut using two Spellbinders dies (Resplendent Rectangles).  The focal is stamped (Inkadinkadoo) and then colored with glitter gel pens.  

The tag is a freebie from Paper Wishes - designed to go with the HOTP paper. I stamped on it with a sentiment from one of the small stamps from HOTP. The flowers and brad are some I had in my stash. 

Monday, March 25, 2013

Masculine Birthday


I seem to always have a challenge making masculine cards, but as I mentioned in a previous post, I've been needing a lot of them lately.  This first card is obviously for a 90 year old.  

The card was created with papers from the paper swap along with some plain colored cardstock. The colors go together better than they appear to in this picture.   The focal was both stamped and embossed.  Most stamps were HOTP, but I also used some alphabet stamps that I had on hand.  The stamped focal was also heat embossed.  Obviously, I used a Spellbinders set for cutting out the matted "90!"  Another trick I used that I have found to be a time saver is that rather than mat each of the pieces of the focal, I used a straight edge and a sharpie to draw on just the edges.


I wanted this card to be a masculine one, but it had some pink on it.  So, I covered the pink with strips of dark brown cardstock.  I got the paper in a swap, so don't know who made it.  I liked it for the background because I thought the stripes looked like roads and thus went well with the focal.  The focal was stamped with stamps from HOTP Masculine Collage set.  I heat embossed the word "Celebrate" with clear embossing powder to make it stand out better (using an embossing pen). Obviously the focal and mat were cut with a Spellbinder's die set. The "Happy Birthday" is an outline sticker. It started out silver, but I used brown StazOn ink to color it.  The little blue corner treatments are "innies" from a corner punch (Card Creators).

Sunday, March 24, 2013

Border Cards


Here are a couple of birthday cards with focal borders - background papers for both are from the paper swap I participated in.  I know the purple one is HOTP - not sure about the second one.  Both are fairly simply made.  

The focal border for this first one is made in 2 parts - the border itself is a printed one from my stash - no idea where it came from (but quite likely HOTP).  The flowers are a digistamp that I colored with my gel pens & Dove blender. The greeting is a stamp from HOTP.  The dark purple is a glimmer paper which I embossed, and the 3 dots in the upper right corner are Jewel Dazzles.


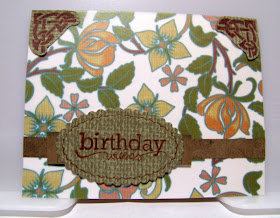
This card focal has 3 pieces to it: a narrow band and then somewhat wider band behind an oval.  The greeting was stamped and then embossed with clear embossing powder.  The focal was cut and embossed with a Spellbinder's die before I drew around the embossing with a pen.  The corner treatments are a stamp (I think it's HOTP). 

Thursday, March 21, 2013

Bathtime Bliss

This is a bit of a different card.  It just sort of evolved.  This card started with the little 2 1/2" x 3 1/2" piece of bubble patterned paper that I got in a swap.  With all the bubbles I immediately thought of bath time.  The bathtub was cut with my Silhouette - with a pattern I found on UKScrappers website.  The duckie is a stamp from Studio G that I colored with Smooch ink - (I made the orange by combining red and yellow ink - didn't have orange Smooch though I know it's available).  The word "Bliss" is from the Artful Collection Stamp set from HOTP, and the "Birthday Wishes" is a stamp from Studio G.  Parts of the striped background paper are flocked.  I got the paper in a swap and I THINK it came from HOTP, but I'm not certain.

Wednesday, March 20, 2013

Anniversary Love


This card was made at the same time as the one I showed yesterday.  You'll probably notice that many of the same elements are used (and I'll refer to the previous card several times - the one shown yesterday). The focal was cut on my Silhouette and layered as you see here - with little heart outline stickers added. The background is the same patterned paper that shows up in the card focals. It was embossed with the same embossing folder I used on the previous card.  The sentiment in the upper right corner is what remained after pulling the sentiment stickers off and using them on the previous card.

Tuesday, March 19, 2013

Stair Step Anniversary


Here's an anniversary card I made recently.  It's called a "4-step card" and was based on Norma's template shown here. This is a square card.  What you see above is the inside.  The "LOVE" steps were based in letters cut on my Silhouette and double matted before adhering to the card.  The rest of the decor and the sentiments are stamped with opaque white ink.  Here's the outside:

The hearts are cut with my Silhouette and layered.  The doily shaped mat is made using a multi-punch before embossing with an embossing folder.  The "Happy Anniversary" was a silver outline sticker that was colored with alcohol ink.

Monday, March 18, 2013

Challenge Cards

This first card was designed for the March 2013 PW sketch challenge. It has lots of paper layers, requiring me to pull together many different different but coordinating papers from HOTP - many are papers that have been around for quite awhile.  Because this was a masculine card, I decided against using flowers on it.  Instead I made the focal itself a bit more fancy.  The words are heat embossed to help them stand out better. The focal layer is popped up on foam tape for a bit more dimension.

This card was also made for a challenge on the Paper Wishes message board.  This time it was a color challenge - to use coral and gray.  I guess the coral may be a little on the light side, but this is what I came up with.  The patterned papers are from HOTP - though older papers.  The gray glimmer paper is embossed with an embossing folder.  The border stamp is from the Stamp and Punch set (HOTP).  I purchased this set for the frames and greetings, but am finding the little border stamp that comes with them to be a really nice one that I'm using a lot. The "U" is popped up on foam tape.

Sunday, March 17, 2013

Black and Blue


This focal is another black embossed stamped image using a small stamp from HOTP - stamped on a small piece from the swap set I got.  The sentiment is another stamped and embossed image from HOTP. The focal is matted on a black piece that was cut and embossed with a Spellbinder's die (Resplendent Rectangles).  The patterned papers are more that I got in those swaps I've been mentioning.

Saturday, March 16, 2013

Thanks Sew Much


I love this little stamp set I got with my Cardmaking & Papercraft magazine subscription. I think sometimes I love the subscription more for the included stamp sets and papers than for the magazine itself!  The stamps are great and this one is no exception. I stamped the focal - sewing machine & sentiment - and embossed with fine black embossing powder.  Then I colored in the silver bits on the sewing machine with Smooch ink.

The mat is made with a Card Creator die from Spellbinders and threaded with pink ribbon.  The background is pearlescent vellum embossed with an M-bossabilities folder.   I added the pink stitching lines with a glitter pen.

Friday, March 15, 2013

Miss You Dancing!


Another swap-based card - this focal started with a small stamp from HOTP stamped on this lovely purple paper.  I fussy cut around it and matted it using dimensional tape. I added touches of silver with a glitter pen and added a little pink "gem" to the buckle of the belt. The shoes and little black flowers (at the bottom ) are Scrapbooking Dazzles, and the centers of the little flowers are silver Jewel Dazzles.  The sentiment is stamped with stamps I made with my Stampmaker.

Thursday, March 14, 2013

Another Red, White & Black


It always amazes me how little paper it takes to make a card.  I recently participated in a couple of swaps where I got some 6" x 6" papers and some 2 1/2" x 3 1/2" papers.  The smaller ones are great for focals or matting focals.  The larger pieces work great for backgrounds for my cards, with enough left over to use on the inside of the card.  I've made several cards using them, and hardly made a dent.  Here's another one.

This focal was stamped and embossed with fine black powder (HOTP stamps). Though you can't see it in the picture, the white card mat is embossed.  The white stripe is grosgrain ribbon; the three little vinyl pieces in the upper right corner came from a Scrapbooking Dazzles set.

Wednesday, March 13, 2013

When is it done?


Sometimes cards come together easily - sometimes they don't.  This one was one of the latter. Some of you have asked me to share my artistic process, so I thought I'd share a pictoral record of this one.  I had the basic elements, but just couldn't seem to get them to come together.  This is what I started with:

The large black shape in the upper right corner was cut on my Silhouette.  The focal was stamped and embossed with fine black embossing powder (stamp from HOTP).  The patterned paper for the focal and mat were some ATC-sized papers I got in a SWAP.  I liked the basic elements, but it just felt incomplete - like something was missing.

I added some sticky-backed vinyl circles for flower centers, some Jewel Dazzles, and vinyl pieces to make the focal look like a hanging frame.  I liked the hanging frame, but wasn't sure I liked the card layout.  It felt too busy.

I thought maybe it would help if I moved the upper left flower a bit lower, but it still wasn't right.  Perhaps if I moved the flower lower still:


Moving the flower all the way down to the focal looked better, but the card seemed a bit off balance.  Maybe if I moved the whole focal a bit to the left?  That finally gave me what you see at the top of this post.

Tuesday, March 12, 2013

Masculine Card


In the last month, my need for cards has greatly outstripped what I had made ahead.  This was partly true because of the sheer number of cards I've needed. For example, where I usually send one or so a month, I've needed 10 in the last 3-4 weeks.  This means that where I usually try to keep:
  • 15 or more Thinking of You cards on hand - I only have 4
  • 5 Sympathy cards on hand - I have NONE
  • 10 Thank You cards on hand -  I have 2
  • 2 Get Well cards on hand (I usually use Thinking of You instead) - I have NONE
  • 5 Birthday cards on hand - I have NONE
Yikes! And the challenge has been exacerbated by the fact that so many of them were going to males!  I hadn't realized how much my stash of home-made cards was weighted toward the female perspective!  In the past, it just so happened that most the cards I needed to send were to women with just an occasional male in the mix.  But that has not been true in the last few months!  Of the last 6 sympathy cards I've sent, 4 have been to males.  And of the last 6 get well cards I've sent, 5 have been to males.  No wonder I was running out of appropriate cards!

Obviously, I need to get a bunch of cards made - and I decided I better start with some masculine ones! Today I'll show three of them.

The first one (above) is based in the Masculine Collage stamps from HOTP.  The background paper is from the Cardmakers Classic Creative Pack from HOTP.  The patterned papers used for the focal were ATC-sized papers I recieved in a SWAP -  I heat embossed the words to try to help them stand out better against the background.

Here are a couple more I made:
On this last card, I added gold smooch to the stamped images.  The patterned papers used for matting the focals on both of these were more from the SWAP mentioned above. For these last two cards, though most of the stamps were from HOTP, the focal on the "Thinking of You" one was made with a stamp from Stampendous.

Monday, March 11, 2013

2 More Swap Paper Cards

Yesterday I mentioned a paper swap I participated in.  Here are a couple of cards I made with some of the paper I got from that swap.  Both cards are also made using up some old yellow card bases I've had on hand for awhile and tend to avoid using.  Both are also get well cards for dance friends.

This first card base was a window card, so I tried to work with that.  I covered the front of the card with a pretty paper (from the swap), saving the little square that remained when I cut out the window portion to match the card base.  Then I decided to use a square border stamp with it (from a HOTP set) - I stamped THROUGH the square hole.  This stamped a bit of a border around the window itself, but put most of the stamp through to the inside (see next picture).  I matted the little saved square of paper on a brown piece of cardstock, turned it on point for a diamond shape, and stamped my focal image and sentiment before attaching it in front of the window - leaving just a hint of window at the corners. 

Opening the card shows not only the square frame that I stamped previously, but also side borders stamped from the same stamp set.  Though that set has a "thinking of you" stamp, I chose to use one from my K & Company stamp set instead.  The finished card had a little butterfly (like you'll see on the next card) in the center of the brown cardstock you see through the window - but I forgot to put it on before taking the picture!

This is the second card I made with these papers.  It started with one of those "accidents" that I had to deal with.  Unknown to me, the card had fallen on the floor and the back of it had gotten marked up.  I could never send a card that looked like that, so I tried to figure out what to do about it.  I decided to fold the card back the other way so the back of the card was now the inside - and ready to be covered with paper to hide the messy marks.  Not wanting the oval cut-out to be at the bottom of the card, I turned the card on its side as you see here.  (I did re-ink the edges of the oval and card with the tan-brown color that I used around the sentiments, so they'd stand out better - but didn't get another picture.)

The card front is embossed with an M-bossabilities folder from Spellbinders.  The "Thinking of You" is once again a stamp from K&Company.  The name is built from individual alphabet stamps that I got second hand so don't know who made them.
 
On the inside, the green patterned paper hides the marks I mentioned earlier.  The flower stamp (a small stamp from HOTP) is stamped a couple of times, then colored in with stamping ink and my Aqua Painter.  The little butterflies are a portion of a mini stamp from Inkadinkadoo. They were stamped on bits of leftover paper from the previous card, so needed no additional coloring.  Their little wings are lifted with foam tape. A strip of the paper leftover from the first card creates a border across the bottom. The rest of the leftover paper is cut into two little squares.  These are turned on point, stamped with my sentiment (stamp from a HOTP set), and popped up on foam tape.

Sunday, March 10, 2013

Swap Card

Recently I took part in a paper swap.  We swapped 6"x6" papers.  This card uses one of those papers and part of a HOTP Color Me card topper someone stuck in with the papers I got (thanks Penny!).  The paper itself has kind of a water color effect background with turquoise, yellow, and pink/peach colors in it.  

I used similar colors of Smooch Ink to create a more vivid water color background for the paper.  To do this, I applied the color with my Aqua painter instead of using the normal applicator! I did the same, making lighter versions of the colors for the background on the topper.  I used the ink directly as normal to create the vivid colors on the butterflies.  

As you can probably tell, I made the large butterfly dimensional by fussy cutting it and using foam tape to lift the wings.  Since I didn't want the removal of the butterfly to leave a hole, I used it as a pattern to cut a piece of turquoise glimmer paper that I used as the butterfly base.  A bit of ribbon and the card is nearly done.  I haven't yet added a sentiment because I'm not yet sure what occasion I'll want to use this card for.

Saturday, March 9, 2013

Two Extra Pages


Yesterday I told you I made a couple of extra pages for the scrapbook I made from the Memory Board.  This page is a poem a friend wrote that I wanted to include.  The shell borders are made the same way as I've discussed previously (punch & ribbon).  The blue on white border is printed along with the poem.  The name at the top of the page is cut with my Silhouette, and mounted on a mat cut with a Spellbinder's die.

This is the last page of the book. I had been asked to take pictures at the funeral and reception following it, so this page has a DVD Slide Show of those pictures.  The CD below it has the picture files themselves - both from the funeral, and for the pictures in the scrapbook itself. I made pockets for them out of vellum so one could easily see what they were.  The border is the same as I did on the page with the poem - except that I used gold ribbon down the center instead of blue.

The final step was to dress up the front of the scrapbook a bit.  I made it easy on myself by cutting sticky-backed vinyl on my Silhouette:


Friday, March 8, 2013

Memory Board to Scrapbook Part 5


Today I'll show the last few pages that were created from this board.  I DID add two extra pages, which I'll show tomorrow. At this point there were only a few pieces left to move to a scrapbook page. I made them into 3 pages:


This was another challenging page.  I was pretty much out of the blue patterned paper - only a little left for a mat for the colored picture.  This wasn't my best page, but it was enhanced by adding the mats with corner punches to the two black and white pictures, adding the word "Play" to the picture at the top, and adding the stamped saying as an embellishment (it was cut and matted using Spellbinders Marvelous Squares Dies).

I wanted to keep the title from the Memory board, but these words were pretty large to be a title with pictures on the same page.  I decided to just make them as a stand alone title page - embellished with elements cut with some Spellbinders dies. The were cut from the blue glimmer paper that was used as a mat for the words, and matted with the same glitter card stock that made up the base of the words.

This wedding page has the same gold background as several of the other pages.  I wanted a blue mat for the picture and was limited by the size I could cut with my die (same Cheery Lynn dies used on the page I showed yesterday). If I made it tall enough it was too wide and didn't show enough of the gold to suit me.  So, I turned it on the diagonal - worked great.  The corner treatments were made with a small leftover piece of the patterned paper cut into triangles.  These were enhanced with a bit of border that I had snipped off from the die-cut mats I showed yesterday.  Whew! It sure felt good to finish turning this board into scrapbook pages!

Thursday, March 7, 2013

Memory Board = Scrapbook Part 4

Continuing my look at turning a memory board into a scrapbook, I once again remind you of what the board looked like to start with.  Today I'll take a look at the four pictures across the center of the gold section.  I made them into 4 different pages:


Here you can see that I added to the title, cutting the words "to" and "OREGON" (with my Silhouette) to add to the original title "Moving".  I used multiple mats to create the illusion of a larger focal picture.  The mats were cut with a die set from Cheery Lynn. The die cut a border that was a bit too lacy for this theme, so I just snipped it off, leaving the edges you see here.  The borders are done with an EK punch.  My paper was only 11" long which left a half-shell at the bottom of each.  So, for each border I punched an extra shell, aligned it exactly on top of the half shell and glued it in place to create the look you see here.  The border was finished off by running a ribbon down the center of it.  What I had was a satin ribbon which seemed too dressy for this page - so I just put it wrong side up!  Looks just right!

This page is a fun one and I wanted to add to the fun a bit.  You may be able to tell that the border is created with the outside of the die cut used on the last page (not having a 12 x 12 machine, when I used the die, I folded my paper in half so I could leave the outer part of my 12 x 12 page intact). The corner treatments started with a Nestabilities Label from Spellbinders. To check out the technique, see earlier post here. The corners are "enhanced" by the addition of little "worms" that I cut on my Silhouette.


 This page was a challenging one for me.  I liked the picture for the background as golfers are often out in a misty morning like this, but even with triple matting, the picture was not large enough.  Adding stamped friendship sayings using white opaque ink (Daisy White from Close to My Heart) helped a lot.


This was another page that took some work.  It's such a silly picture, taken at McGraff's Fish House.  It was a bit of a challenge to figure out how to make it look like it belonged with the rest of the pages.  As you can see, I added some gold borders (leftovers from the glitter cardstock I used earlier)to help it tie in with the rest of the book, and used the blue marbled background that I'd used elsewhere.  Matting the picture several times helped, but it still needed an extra something.  I looked through my stash, hoping to find some fish - but no such luck.  Then I remembered a paper piecing book I got from Hot Off the Press.  Voila!  Some paper-pieced fish to finish out the page.


Wednesday, March 6, 2013

Memory Board = Scrapbook Part 3


Continuing my "Memory Board to Scrapbook" series, I continue to show what I did with the center section.  Today I'll show you what I did with the pictures that are on either side of the collage at the bottom:


At first I wasn't sure what to do with these.  I needed to put the pages together quite quickly, so didn't have a lot of time for fussy stuff.  I knew I wanted them on the gold background, and I cut a nice border from scraps of the blue paper, but I needed a title or journaling and didn't feel like cutting something with my Silhouette again!  

Techniques from cardmaking came to the rescue.  What I would have used for a focal on a card, easily became title/journaling/enhancement.  They are stamped on gold glitter cardstock with black StazOn ink. The pieces are then cut and matted using Spellbinders dies (and Magic Matter for the one on the left). The stamps are from a variety of places.  The decorative oval is from a set from Hot Off the Press, the words inside are from K & Company, and the saying on the right is from a Fiskars set.

Tuesday, March 5, 2013

More memory board to scrapbook pages

Here's a reminder of what the board looked like.  I've already shown how the side panels turned into pages.  Here is what I did with some of the center portion:

This is the first page of the book.  If you look at the top center section of the memory board, you can see that I just lifted this entire piece and simply put it on a white sheet of cardstock.  Quick, easy, and a nice way to start the book.  The border on the gold mat was cut with a Cheery Lynn Reflections die.  The corner treatments were cut with my Silhouette.


These two pages are side by side.  The gold was a 2" x 3" piece of hand-made paper I bought at an art store close-out.  It was a wonderful size for the board - and then I just cut it into 6 pieces to serve as backgrounds for scrapbook pages. With my background in place, the page at the right is quickly finished - simply pull the collage off the memory board and place it as you see here.  The page on the left took a bit more work.  Checking the memory board again, you can see that the picture was there in a narrow white frame, and the words "Husband & Wife" were also there (below the collage at the bottom).  The corner treatments were leftovers, and the word "LOVING" was one I had cut on my Silhoutte and ended up not using on the board.  I had some leftover pieces of the blue marbled paper and used it for the borders and large mat.  A bit of tan ribbon completes the borders.

Tomorrow I'll show you more of the pages made from the center of the memory board.