Please let me hear from you!

This blog is for sharing a love of paper crafting. I love paper crafting -
and Stampin' Up! products in particular -
so much so, that I became an independent Stampin' Up!®™ demonstrator earlier this year!
Full disclosure: I get a small commission on purchases made using links from this website - but this in no way affects your price. It just serves to help support this blog. Thank you in advance for that support!

Enjoy browsing my blog, and I'd love to hear from you.
It is what helps make the time I put into this blog feel worthwhile, and always brightens my day.

NOTE: All Stampin' Up! Images © 1990–2025 Stampin’ Up!®

Tuesday, July 2, 2024

2024 June Swaps


June material swap is to be a focus on summer.  

Materials Swap - My Materials:

One of the things I think of in summer is the beach, so I put together elements for an ocean scene. 

 
The double-sided patterned paper is from HOTP.  The stamped and die cut images were created using two sets from Spellbinders - Seahorse Gardens and Water You Up To?  I stamped the images with Distress ink - and then colored them with the same by pressing ink into my craft sheet and picking up with a water brush. I found it worked best to keep the brush fairly dry.  In addition, there are two pieces of colored card stock, and one of white card stock besides the card and envelope.  I added some blue jewel dazzles, some little google eyes and some little clear shiny pieces from my stash.

Colors used for the die cut pieces:
  • Seahorse & Sea Weed: Peeled Paint & Faded Jeans
  • Crab: Barn Door
  • Jelly Fish & Shells: Vintage Photo, Marigold, Worn Lipstick

I cut a piece from the lower left corner of the patterned paper and matted it with the navy card stock (after cutting the center of the navy to use for something else) before adding it to the card front.  I fussy cut the sea weed and crab and glued them to the scene.  Then I matted the sentiment and seahorse with more of the blue before adding them with adhesive foam squares.  For my final touches, I used a standard paper punch to cut three small circles from the tan card stock, inked the edges (Chipped Sapphire), and added the smallest blue Jewel Dazzles - then added the little clear shiny pieces for Bubbles.

Inside:

Similarly, on the inside I fussy cut the shells and glued them in place - the glued the jelly fish in place without fussy cutting.

Materials Swap - Partner's Materials: 

The papers were double-sided - one of the hidden sides was a pink pattern - one was an orange pattern (which I didn't care to use).  I LOVE the die cut focal she sent.  So CUTE!

Here's the card I made:

Fortunately she also sent a sheet of plain white card stock so I was able to create the matted blue oval (using distress ink) and mat other pieces (though I had to piece several things).

Inside:

The cupcake was created from one of my most recent Spellbinders dies (Birthday Wreath Add-Ons) - so glad I have dies like that now!

Card Swap:

The card swap this month was to be "patriotic" themed.  I struggled with this a bit until I found this decoration in my stash - made long ago using my Silhouette (when it still worked).  The background is a white embossed panel (Cuttlebug Swis Dots) matted on blue.  Then I added a bunch of little star shaped Dazzles stickers, and ribbon from my stash.

Inside:

Inside I used a narrow matted embossed panel for a lower border, and added more Dazzles stickers to decorate.

Note: for Digi-Swaps, see June 18 post called Digi-Dogs.

Tuesday, June 25, 2024

Embellishment storage - and more embellies

I got some questions about embellishment storage, so decided to show my system here - along with a few more embellishments I've made recently from new dies.

As you can probably tell from the picture above, I store my embellishments in sheet protectors in a 3 ring binder.  Most of them fit in protectors designed for baseball cards - like you see in the picture above.  I find if I cut a piece of paper to fit in each, I can then put embellishments on each side and see them clearly.  I DID find that some things I made were too large for that size of sheet protector, so I added some protectors that were designed to hold photographs - I think these are for 4 x 6 size:


This last page shows some of my most recent embellishments:

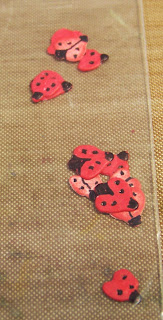
These are from a Spellbinders die set called Winter Evergreen Foliage & Ladybugs.  The foliage is pretty large, ranging from approximately 2 1/2" to 4 1/2" in length.  The ladybugs, on the other hand, are tiny - smaller than my pink fingernail.  I have learned that for some of these small embellies, it is best to put them in a 2" x 3" little zip lock baggie before putting them in the book.

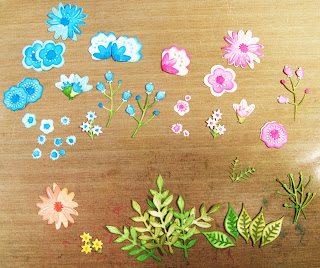
I also made some flowers from the Spellbinders set called Simply Perfect Layered Blooms.  Here's a quick look at some of those.

I had intended to make a set of blue, one of pink, and one of yellow/orange, but when I went to start coloring my second set of flowers, I mistakenly grabbed the blue again and had almost all of them colored before I realized my mistake!  So, I have quite a few of the blue ones!

I sure wish I had thought to do this with my Seahorse Gardens, Under the Sea, and Water You Up To? sets!  Those would be nice to have!

Wednesday, June 19, 2024

HD Perfect Days - Bicycle Blooms

Today I have another set of cards from Hunkydory kit called Perfect Days - the set called Bicycle Blooms.  Here's what the set looked like:

As you can see, there was a sheet of AS (adoreable scoreable card stock), and one and a half sheets of die cuts.  I used these, and some stuff from my stash, to make 4 cards:

I thought I was going to get 5 cards from it, but ended up not wanting to use a bicycle tire that you could see the birdbath through - since the rest of the birdbath would not be there.  I just layered the extras on the cards.

Card #1:

The entire panel here was cut from the AS - complete with focal.  I inked the edges, glued it in place, and added more die cuts - including sentiment - easy peasy!

Card #2:

This card was my take on a sketch challenge on the message board I frequent.  I started with the dark pink panel, inked the edges, then added a couple of patterned papers whose edges had also been inked. Then I added the focal. I added 3 Dazzle border strips - being careful to take them in front of the flowers and behind the bicycle (a second bicycle piece I glued on top of the first).  Finally, I added the sentiment & some "tails" for it.

Card #3:

I wanted this card to be a slimline card - so cut a piece of the AS and added borders top and bottom, along with a couple scraps of the AS.  I inked the edges of all, then added the bicycle piece - cutting it to fit.  After gluing the panel in place on the card front, I added a sentiment & mat.  The mat will stay, the sentiment will be removed until such time as I know the occasion for which I'll use this card. (Sassy's LLC sentiments are great for doing this!)

Card #4:

This final card was also cut from the AS.  I added ribbon from my stash and covered it with more bicycle and flower pieces.  Once again, the mat will stay, but I'll remove the sentiment and add an appropriate one later.

Tuesday, June 18, 2024

Digi-Dogs

Today I have three cute dog pictures.  All three use two printed digital papers - each printed at half a letter size -  focals made from Stampendous Pop-up Puppies stamps and dies, and a bit of ribbon.  

Card #1 (above): As you can see, this first one uses ribbon as a leash.  To make these, I cut both papers to the correct size for a card front that would leave a bit of white showing around it.  I then used a die to cut the middle out of both  papers.  I glued the outer part of the dark paper in place.  Next, I took the inner light colored one and matted it on white before adding it with sticky-backed foam to pop it up.  Unfortunately, I discovered that with the wobble spring for his head that made the card too thick to go through the mail as a standard letter.  So, I left the foam off of the next two. 

Card #2:

As you can see, this one is the reverse of the last with the larger light-colored piece on the outside and the darker on the inside.  On this one, I used a leftover piece of ribbon that made it look like his leash is too short.  Oh well.  I think when I know how I'll use these first two, I'll add a strip sentiment to the front of them.

Card #3:

 
This one has room for a small sentiment in the upper left corner - once I know what occasion it will be used for.  The dog is from the same set, but a very different look because I used a different head for him.   At this point I also only had leftovers that were not large enough to cut for card fronts.  So, I split the lighter colored one and put it either side of the darker - adding ribbon to set them apart before inking the edges and gluing the whole to the card front.  This dog didn't get a leash, but his head is still on a wobble spring.