MENU

Friday, June 18, 2021

Happy Father's Day 2021

Today's card was made using a Debbi Moore download set called Vintage Discovery.  I thought it perfect for my dad who was once a private pilot.  I made it as a slider card (okay, for it to work, the plane flies backward - it's a trick plane okay?!) :D  The background paper, glider and border all came from the set.

I learned to make this style card from a HOTP DVD called 100 Moveable Parts Cards. They have full instructions, video, and pattern there.  Since their pattern was for a standard 5 x 6.5" card, I made my own pattern.  Construction is really quite easy:  

  1. Create a pull tab from heavy card stock - rounding the corners if you wish.  
  2. Cut a piece of paper that will go behind the background paper and attach it to the card front (you could stamp a hidden message at this time if you wish, but I felt it was easier to wait and do it later so I didn't have trouble aligning it. 
  3. Cut a slot out of the background paper where you want the image to slide (best if it is heavier weight - more like light card stock). I simply held up the background paper with the slider in front where I wanted it for the finished card and made pencil marks to show me where I wanted the slot to be - then fussy cut it.
  4. Punch a small hole in the focal image where you want it to attach to your slider (once again, if it is at least printed on light card stock it will be better - especially if it's a large one like this is).  
  5. Punch a small hole in the pull tab where you wish to attach the focal image.  
  6. Place a brad through the punched hole in the focal image, through the slot, and through the punched hole in the pull tab and tighten it closed.
  7. From the back, with pull tab in closed position and correctly aligned, add strips of adhesive to the back of the background paper on either side of the pull tab and on the rest of the background paper - then adhere it to the card front so that there is no adhesive where you want the slider to slide.  
  8. Make sure your slider slides properly.  I had to do two additional things for mine - in part because it was so large.  First, I added a bit of baby powder through the front slit and slid it back & forth to help it slide more easily.  Second, I attached just the tip of the banner to the pull tab so the image wouldn't twist because of its size.
  9. If you want a hidden message - stamp or write it through the slot.

Slider Open:

Inside:

I made a border with a strip of scrap maroon card stock and a sliver of the "sky" paper that was left.  The sentiment was fussy cut from the set.

Wednesday, June 9, 2021

Santa Baby ACK Part 3

So far I've made 12 cards from this kit, so today I'm starting with

Card #13 (above): Here I've created a background from a piece of the patterned paper - beautiful on its own.  I added a black piece of ribbon near the bottom for a border & inked the edges before adding it to the card front.  The sentiment was cut from the cut out sheet and then double matted in the patterned paper & black.  A few black "crystals" complete the card front.

Inside:

Inside, as strip of the patterned paper creates a border that the ornament die cut "hangs" from.  The sentiment is from a HOTP set called Christmas Cheer.

Card #14:

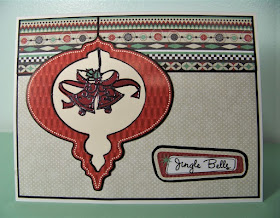
This background was created from two pieces.  The dotted part is one piece, and the striped part is another.  Both pieces are from patterned paper in the kit.  The ornament is a die cut from the kit. and the sentiment is a cut out from the kit - double matted once again.  The bells inside the ornament are dazzles that have been backed with paper & glued to the plain cream colored paper from my stash that sits behind the ornament die cut. I used a sharpie to draw the "hanger".

Inside:

Inside is more of the striped patterned paper and an ornament die cut from the kit.  Once again a Sharpie drew the hanger part.  The sentiment is another from Christmas Cheer (HOTP).

Card #15:

More paper from the kit forms the background, with black die cut border added (Spellbinders Ironworks Accents).  Sentiment is stamped (using Snowbird small stamp from HOTP) on a fussy cut cut out piece from the kit.  The mittens were stamped (HOTP Mittens small stamp) on a piece of white card stock & the cuffs were also stamped on a scrap of the green paper, fussy cut, and glued in place.  The hearts were colored in with a marker.

Inside:

A strip of paper from the kit and a layered piece made with die cuts, paper pieces, and a cut out - all layered together (and all from this kit) - form the inside of this card.  The sentiment is stamped using another HOTP small stamp (Winter Wonderland).

Card #16:

This is an A2 card, with a piece of the green paper from the kit - cut with a Spellbinder's die (Spellbinders Edgeabilities Bracket Border) and leaving part of the white card base showing.  A strip of tan paper & a strip of the striped paper from the kit form a border near the top.  The tag is a die cut from the kit - stamped with a stamp set I got in a cardmaking magazine - can't remember for sure which one.  The set is called Happy Holidays - 21 Vintage Christmas Stamps. A couple of die cut holly sprigs from the kit finish the outside.

Inside:

Inside is more of the same - strips of the striped paper for borders, and another die cut holly piece.  I also used a stamp from HOTP's Christmas Cheer stamp set.

Card #17:

I used up a bunch of little pieces of the striped paper by cutting it into squares and matting them with black to form sort of a patchwork background.  The tree is stamped (HOTP small stamp called Winter Wonderland)on green paper (from the kit) and heat embossed with white.

Inside:

Borders and a focal element were created using black paper from my stash, scraps of paper from the kit, and misc small die cuts (also from the kit).

Card #18:

This is another A2 card.  The background is a leftover piece of border paper - with a strip of black at the bottom forming another border.  A couple of die cuts were layered to form the focal - which was enhanced with some black Jewel Dazzles.  A cutout sentiment was added at the bottom, and a few more jewel dazzles were added to the top.

Inside:

I thought the red paper scraps from the kit sort of mimicked the border on the card front.  I added black & another die cut from the kit.  This time the sentiment was stamped with a JustRite stamp from their set called Deck the Halls. More black Jewel Dazzles finish off the inside.  

Card #19:

For this final card, I mostly had a piece of this very busy background paper.  Going through my stash, I found a focal & greeting from a Debbi Moore download that I thought would go very well.  A bit of the striped paper & strips of black and red from my stash create the borders.

Inside:

Inside I used another piece from the Debbi Moore download, along with strips of patterned paper and plain black for borders.  It's hard to see, but the edges of the borders & the card front are inked for a more finished appearance.

That makes a grand total of 19 cards from this kit!  No wonder I was getting tired of it! :)

Wednesday, June 2, 2021

HD Paws for Thought - The Cat's Whisker's Part 2

Today I have more cards from Hunkydory's Paws for Thought - The Cat's Whisker's set.  Most of the die cuts were already gone - used on previous cards.  I apparently only got a picture of one of those: here, though there have to have been more of them.  Anyway, I'll call this card #2 since we know I got one previously.  The cards in this post were made with the two pieces of adorable scoreable card stock (AS) from the set - most of which had not been used.  I also used the remaining die cuts and misc die cuts from other sets that were left over.  

Card #2 (above):  This card uses a piece cut from the lower border of the AS - pieced with a narrow strip cut from the upper border.  The focal was printed on the AS.  Dazzles create the greeting and similar stickers form the edging around the card.

Inside:

For the inside, I added a strip of scrap from the die cut sheet that would coordinate fairly well with the card front - and bordered it with more of those stickers used on the card front.

Card #3:

The 2nd piece of AS had this cute little cat on it, so I once again cut it so I had a piece of the top border added to the piece from the bottom border.  This time, after inking the edges, I ran a sheer ribbon across the join, and added a bow, and a sentiment before gluing to the card front.

Inside:

As you can see, I took most of the rest of the borders from this AS sheet to finish the inside of the card.

Card #4:

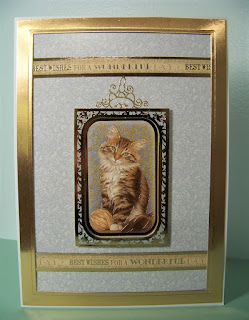
This card made use of the remaining section of the first AS that still had a border.  As you can see, after rounding the corners, I matted it on gold poster board.  I also added a couple strips of the poster board to enhance the borders & form an anchor for the focal (from another set in this kit).  The sentiment was die cut from the same gold poster board using a die from the Octagon Box Kit from Card Making Magic.

Inside:

Once again I've used a small piece of the gold poster board for the border at the bottom and for the sentiment.  Again, the die was from Card Making Magic - this time the A5 Box Kit.

Card #5:

The background is most of the remaining AS - this time framed with gold poster board (die cut using Spellbinders 5 X 7 Matting Basics). The focal was from another set.but the sentiment border was from this one.  I added a lacy sticker to serve a s a "picture hanger".

Inside:

Leftover strips of AS, die cut sheet scraps, and gold poster board form a border for the inside of the card.


Tuesday, June 1, 2021

HD All Things Bright & Beautiful - Always In My Heart Part 1 1/2

This card is another one made from the Hunkydory kit called All Things Bright and Beautiful - set called Always in My Heart.  I'm calling this Part 1 1/2 because I already made one card from this set for my Mom's Birthday in April.  This is a second card made from that set - this time an anniversary card.

The card base was created using a Grand Scalloped Squares die from Spellbinders.  (Align the die so the very top of it extends above the fold and send through the machine.  This makes it so the inside of the card is attached to outside where the die was extended beyond the fold.  To hide this slight shortening of the scallop on that edge, cut another piece as normal and attach to the card front.)  The background paper (from the set) was cut with the same die & glued to the card front.  As you can see, I added several layers of die cuts from the set - some with foam tape for dimension.  The rectangular floral focal is actually from a little book of die cuts.  I thought it coordinated well with the rest.  The "Love" is a Dazzles sticker.

Inside:


 For the inside, I die cut a coordinating piece of green using a die from the Classic Scalloped Squares Small set and matted it on a square of gold poster board.  The "On Your Special Day" is made using a cutting die from the A5 Box Kit from Card Making Magic  I fussy cut a few flowers from the paper in the kit, and then added some more Dazzles (HOTP - the heart ones are backed with pink paper).  So, this makes card #2 from this set - more to come later.