MENU

Wednesday, December 22, 2021

A Quick Scrapbook

Today I have a REALLY quick scrapbook to show you.  I really wanted this scrapbook ready for Christmas this year because it marks 30 years since we first started an important family tradition.  I didn't have a lot of time, so could DEFINITELY have decorated the pages more - especially as I moved farther into it and ran out of decorative bits I had on hand.  I decided I could always come back and add more to the pages as I have time.  At least I have SOMETHING to show the family.  The papers are a variety from my stash.  The ones that I speak of as "pre-designed" or "pre-made" are from a DCWV stack (but I don't remember the name of it.  Other papers are from a HOTP Christmas Sweets paper pack.  Still others are from my stash and I have no idea where I got them.

Page #1 (above): Much of this page was pre-designed.  I simply cut around the corner of the calendar & journaling block so the picture could slip behind it.  I then added a matted title spelling out the year, and a label under the picture.  The snowflakes were ones I had on hand - made with Spellbinder's cut fold tuck snowflake dies.  The candy cane was something I found in my stash, as was the holly piece.  I think they may have been part of a freebie download from HOTP.

Pages 2 & 3:

This dual page layout was made using papers I found in my stash.  The letters that I used for the titles were all from a HOTP set.  Here you can see them a little closer:


Pages 4 & 5:

Because I was in a hurry, all journaling was done by hand.  I'm sure it would have looked better if it had been done on the computer.  I used a large circle stencil to cut out the large circular shapes - would have looked better if both sides had been the same dark brownish red paper - but I didn't have two the same.

And close up:


Pages 6 & 7:

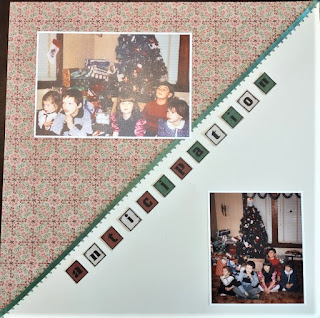
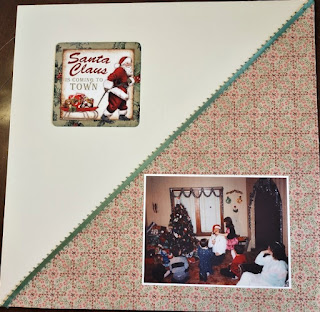
This page looks REALLY empty.  At some point I'll figure out more to add to it.  I cut the patterned paper on the diagonal & added to two sheets of cream colored card stock.  The green border is a ribbon. The "Santa Claus is Coming to Town" is from a Debbi Moore freebie.

Close Up:


Pages 8 & 9:

The titles here were die cut using no brand alphabet dies.

Close Ups:


Page 10:

Once again I used a patterned card stock that basically gave me a "pre-made" page.  It, too, could benefit from added decoration when I have time to figure something out.

That's it!  10 simple and quick pages to help us celebrate this milestone Christmas in our family.

Wednesday, December 15, 2021

A Couple Quick Cards

I needed some quick Thank You cards, so went to my stash of pictures to upcycle and my stash of prepared background papers and created these two cards.

Card #1 (above): Here, a background created with a marbling technique (alcohol ink dripped into a container of water - then "kiss" the white card stock to the water to pick up color).  I believe this one may also have a bit of spray ink added to it.  At any rate, the colors were perfect for this focal that was cut from a calendar page.  The "Thank You" was cut from a freebie Debbi Moore download.

Card #2:

This time the background was a piece of black card stock covered with Golden Glow Opal Polish. The focal was recycled from a greeting card I received, and the greeting was hand written on coordinating paper & then matted with more of the Opal Polish covered card stock.

Since everything was already in my stash, these were very quick cards indeed.

Wednesday, December 8, 2021

Little Birdies ACK - Part 3

Today I finished up the Little Birdies Artful Card Kit (HOTP).  I got a total of 15 cards from the partial kit I had left when I started this a week or two ago. 

Card #11 (above): For this card I took some red foil tape I had and put it across the top & bottom of the card front.  Then I embossed it with the Damask embossing folder (Darice).  Next I added narrow washi tape top and bottom of the red.  Finally, I added my die cuts from the kit.

Inside:

Inside I made the border in the same way as the front - except for the embossing.  Then I added a die cut flower from the kit to complete the inside.

Card #12:

Here I took the green paper from the kit for the background, bordered it with narrow washi tape, and then added die cuts from the kit.

Inside:

Inside I just melded several die cuts (and the scrap of border die cut left over from the card front) into a grouping in the lower right corner.

Card #13:

I found some pink vellum from my stash to back the leftover piece of patterned paper I had, then added die cuts.  The bird is raised slightly above the frame using foam tape.  I didn't get a picture of the inside.  It was just a strip of the vellum with a small flower die cut.

Card #14:

For this one I started with the green paper & washi tape.  Then I backed the focal die cut with an embossed circle from my stash that I hit with a bit of gold ink.  The smaller flowers form a bit of a border between strips of washi tape and washi tape also forms a bit of a hanger for the circle.

Inside:

Inside is just more of the same.

Card #15:

This last card again uses the green paper from the kit - along with narrow washi tape & die cuts from the kit.

Inside:

After creating border strips with the same green & washi tape, I added the die cut flower and called it done.

That's it!  NOTHING left over.  Every die cut & scrap of paper from the kit has been used!  YAY!